“FemTech lader teknologien føle“
FemTech DIKU event for excellent STX/HTX students- exploring the world of components and sensors and learning how to use them in a context. Using a Proximity Capacitive Touch Sensor Controller, we want the students to feel interactive technologies.
We will immerse ourselves in interactive technologies – and explore their possibilities to “feel”. We then use our insights to build a bridge between a creative, physical expression and then the digital output. We work with simple microcontrollers and sensors, and as a participant in the course you will also gain the prerequisites to code for concrete applications of the technology.
The vision is as always: through inspiring co-creation and practical insight into how interactive technologies are developed, as well as what is needed to realize wild and innovative ideas, concrete development and appropriate and engaging design are worked on.
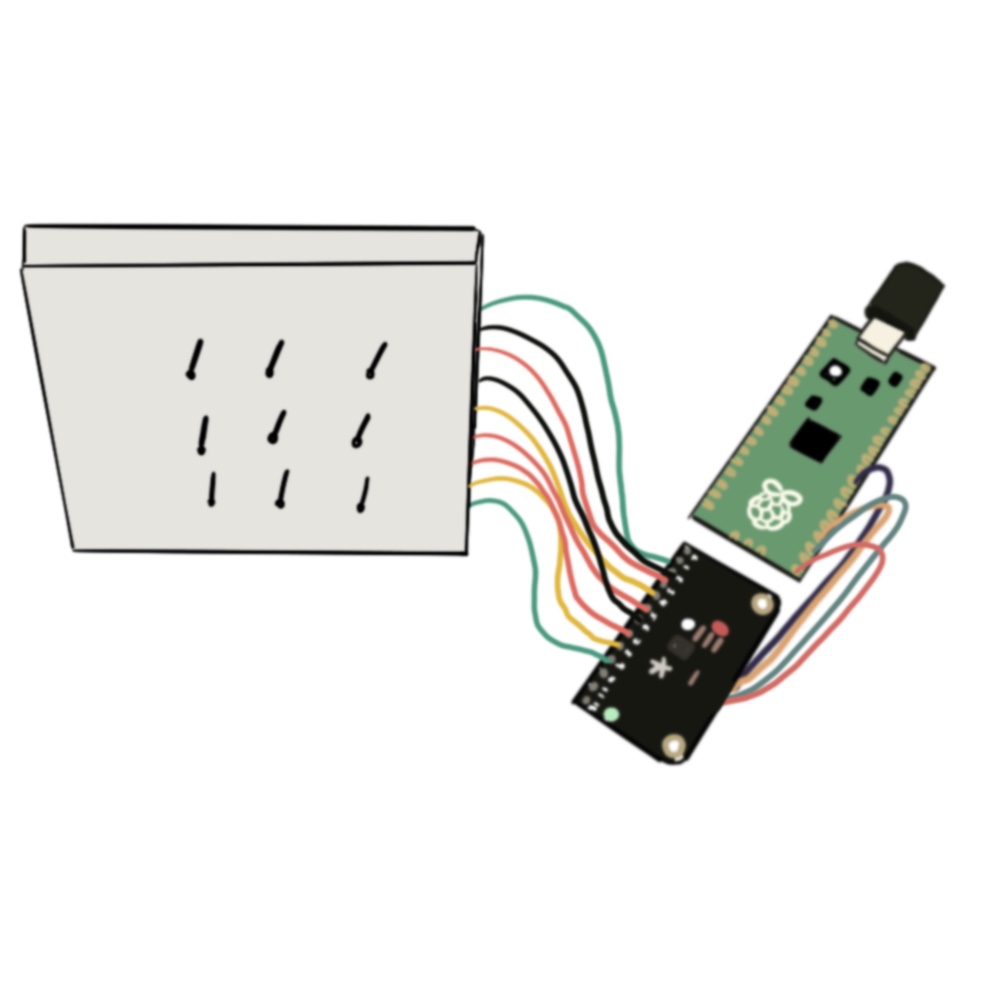
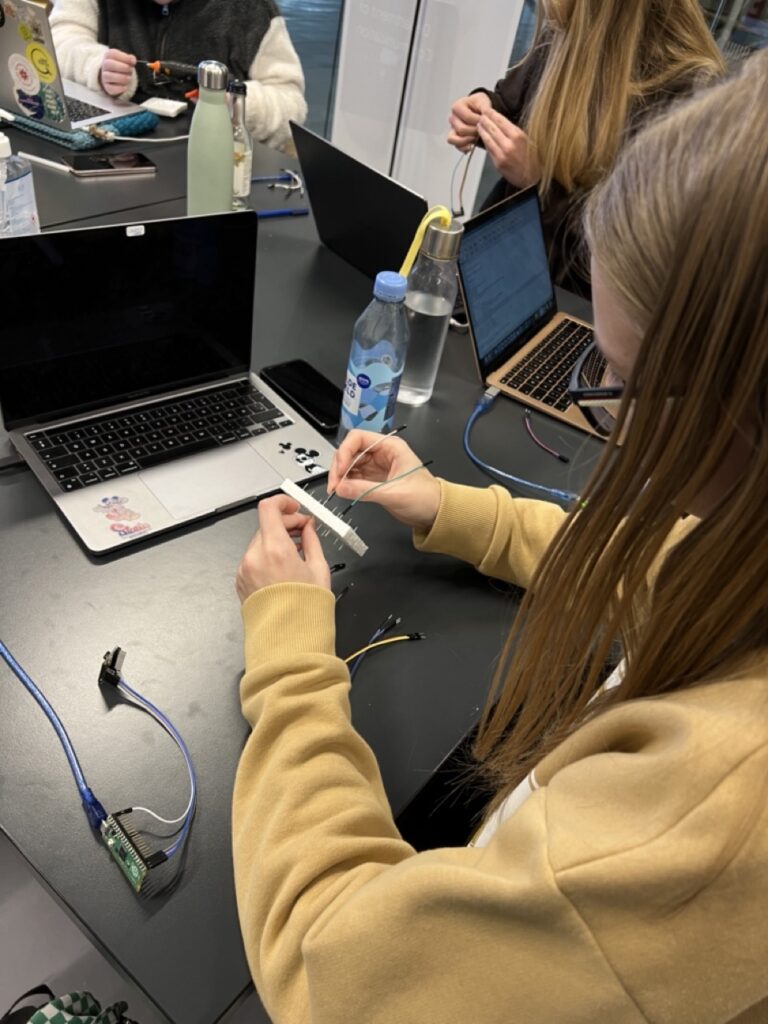
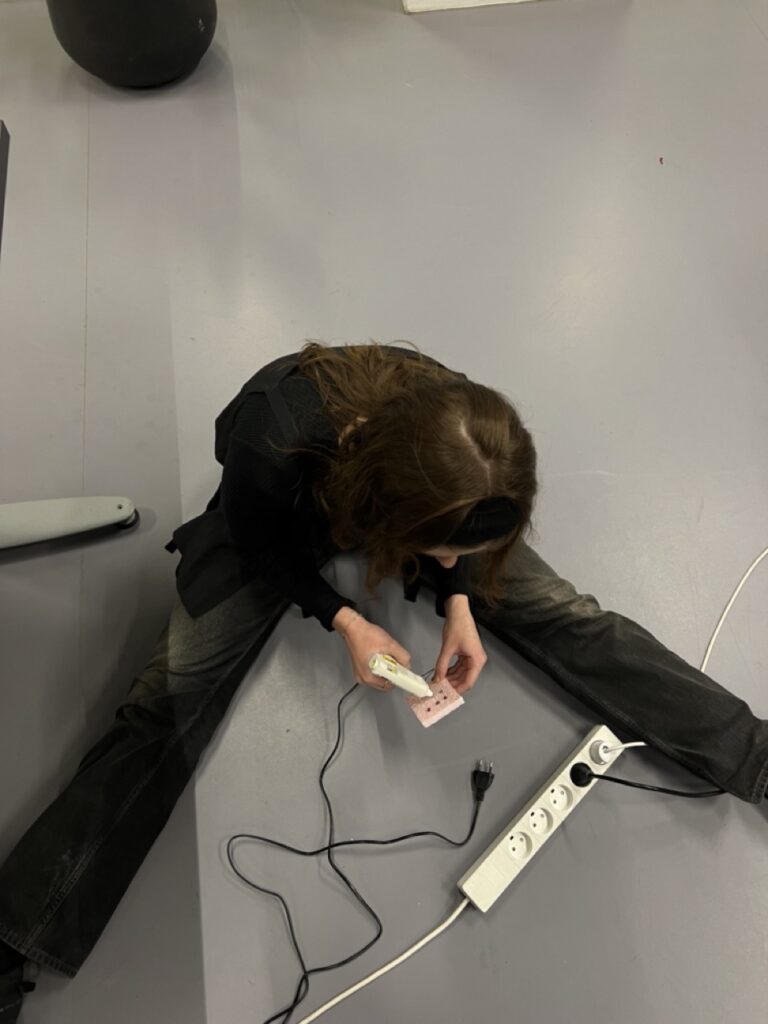
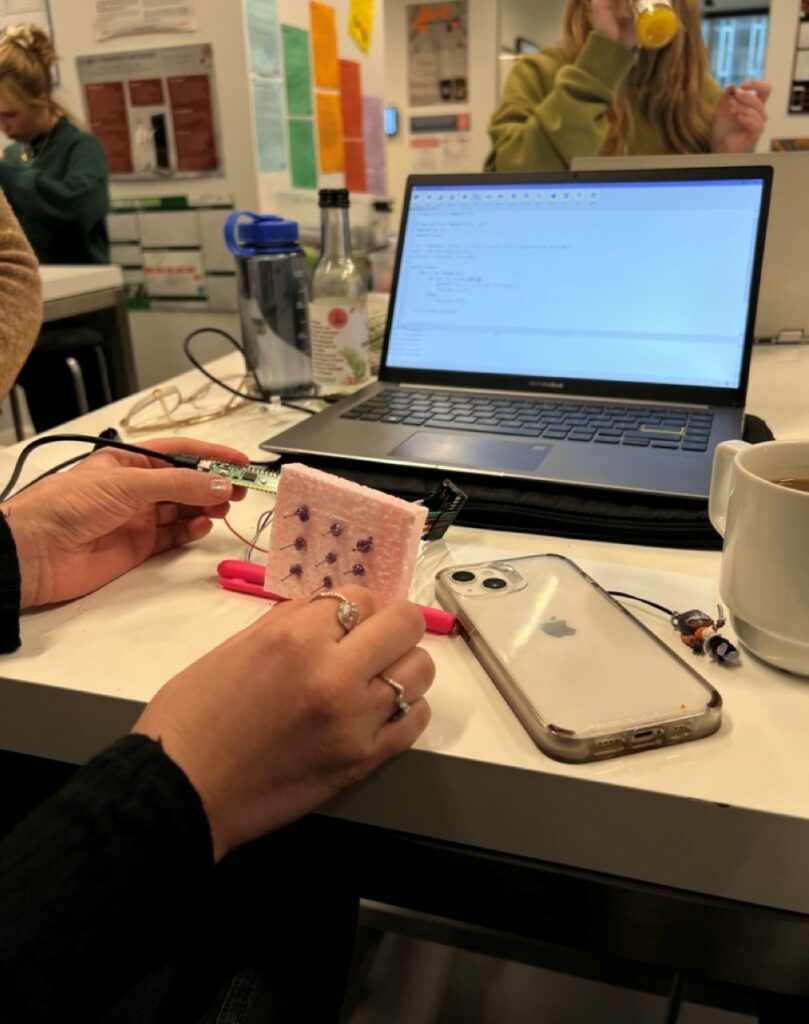
In this workshop it was important for us that the students did not necessarily get to the same result. But they were all given a raspberry pi and a MPR121 sensor, they were told about the idea that we had making the LOLA installation with inspiration from NASA’s core rope memory, also known as LOL (Little old Ladies). From there, only the sky was the limit.
Step 1
Installing raspberry pi pico

- Download UF2-filen: https://micropython.org/download/rp2-pico/rp2-pico-
latest.uf2 - Tryk og hold BOOTSEL-knappe på Pico’en nede, mens du sætter kablet i
og forbinder til din computer – slip nu BOOTSEL - Træk UF2-filen over på Pico-enheden – enheden genstarter selv efter
kopiering - Du er nu klar til at bruge Pico’en (fx REPL i Mu Editor, Thonny el.lign.)
Step 2
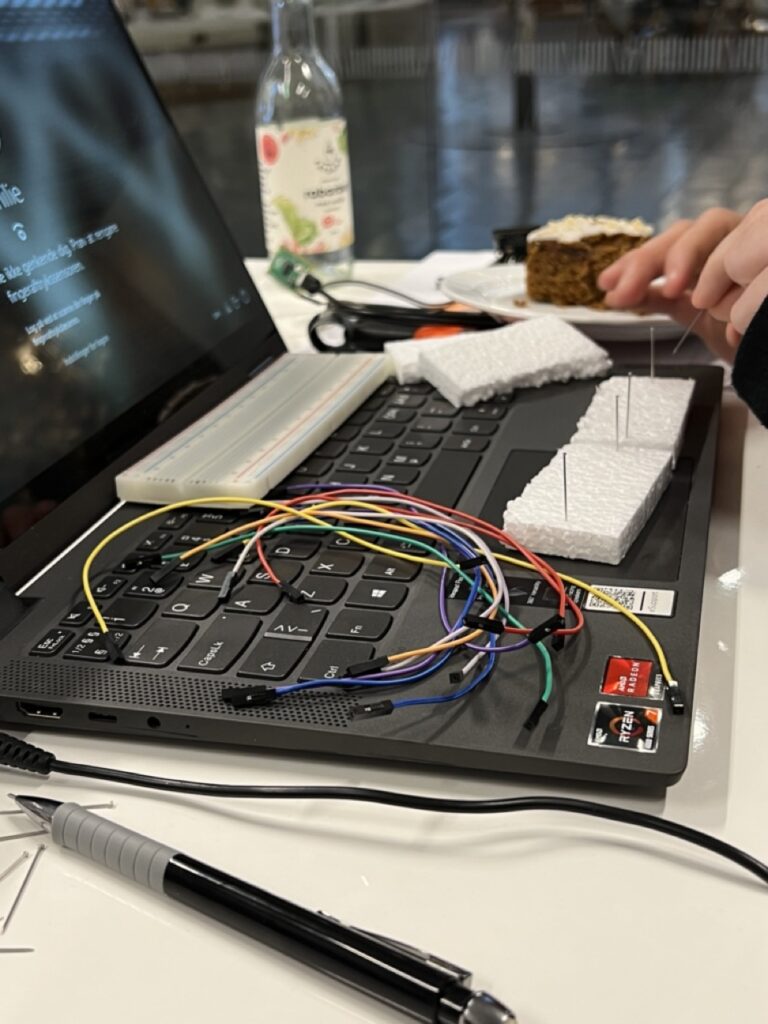
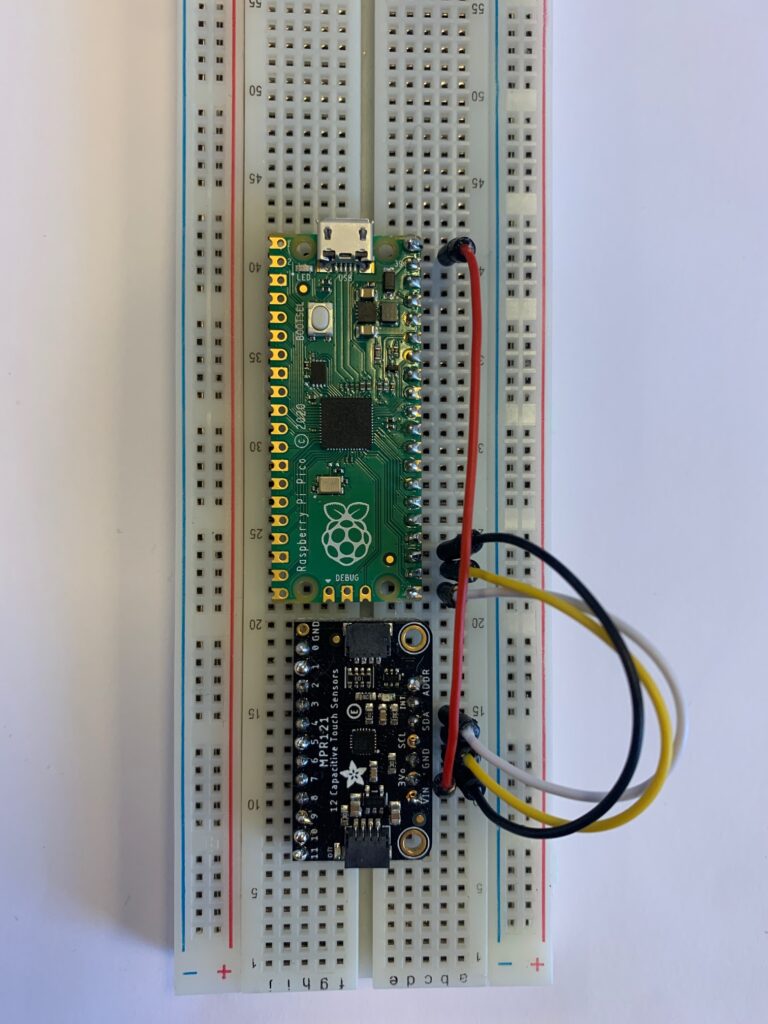
Connecting the wires between the Raspberry Pi Pico and the MPR121 sensor (always connect the wires without the power), and after you have connected the wires, plug in the power cable in the Raspberry Pi.
- Pin 40 (POWER) -> VIN
- Pin 23 (GND) -> GND
- Pin 22 (GPIO) -> SCL
- Pin 21 (GPIO) -> SDA
Step 3
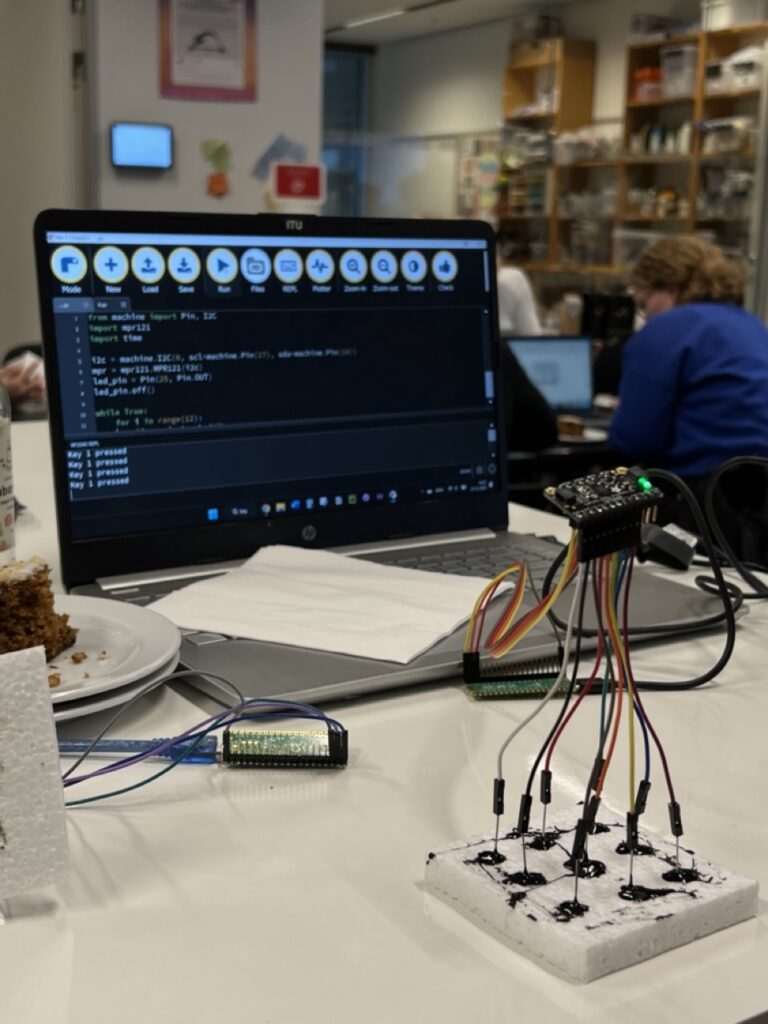
Writing the first code, making the LED in the Raspberry Pi Pico blink when the MPR121 sensor is touched.
from machine import Pin, I2C
import mpr121
import time

rasp_led = Pin(25, Pin.OUT)

i2c = machine.I2C(0, scl=machine.Pin(17), sda=machine.Pin(16))
mpr = mpr121.MPR121(i2c)
while True:
    for i in range(12):
        if mpr.is_touched(i):
            print('Key {} pressed'.format(i))
            rasp_led.blink()
    time.sleep_ms(100)
Step 4
Making the code for the chosen artifact – the artifact we made
import mpr121
import time
from machine import Pin, I2C

i2c = machine.I2C(0, scl=machine.Pin(17), sda=machine.Pin(16))
mpr = mpr121.MPR121(i2c)
push_button = Pin(28, Pin.IN, Pin.PULL_DOWN)

btns_code = [0, 0, 0, 0, 0, 0, 0, 0, 0, 0, 0, 0]

def save_code():
    print('=============')
    print('| {} | {} | {} |'.format(btns_code[0], btns_code[7], btns_code[8]))
    print('| {} | {} | {} |'.format(btns_code[1], btns_code[6], btns_code[9]))
    print('| {} | {} | {} |'.format(btns_code[2], btns_code[5], btns_code[10]))
    print('| {} | {} | {} |'.format(btns_code[3], btns_code[4], btns_code[11]))
    print('=============')


while True:
    logic_state = push_button.value()

    if logic_state:
        save_code()

    for i in range(12):
        if mpr.is_touched(i):
            btns_code[i] = 1
            print('Key {} pressed'.format(i))

    time.sleep_ms(100)# Write your code here :-)
Final Step
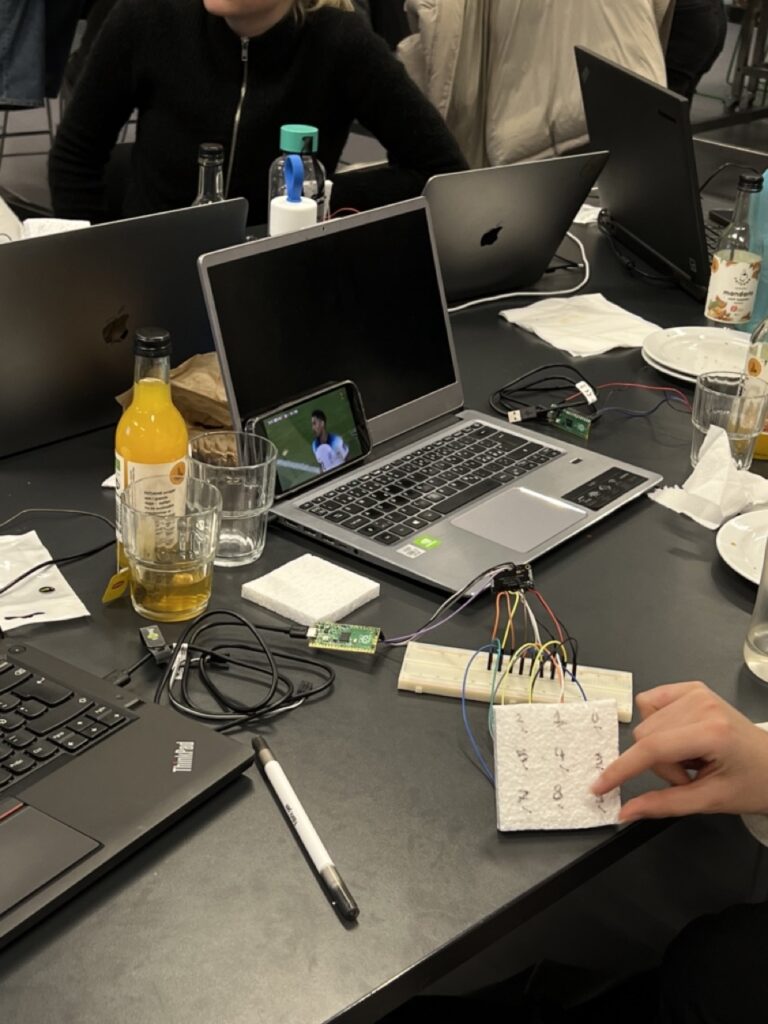
In the end all students were asked to write down some words about what they have made, take a picture of it and post some of the code that was essential for their artifact to work. This resulted in so many creative artifacts, and functions, which reflects how different they viewed the idea from the beginning.
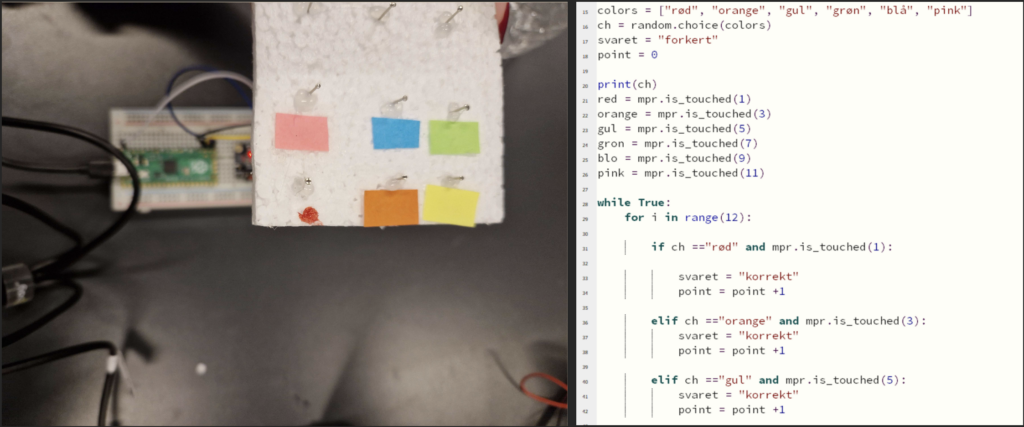
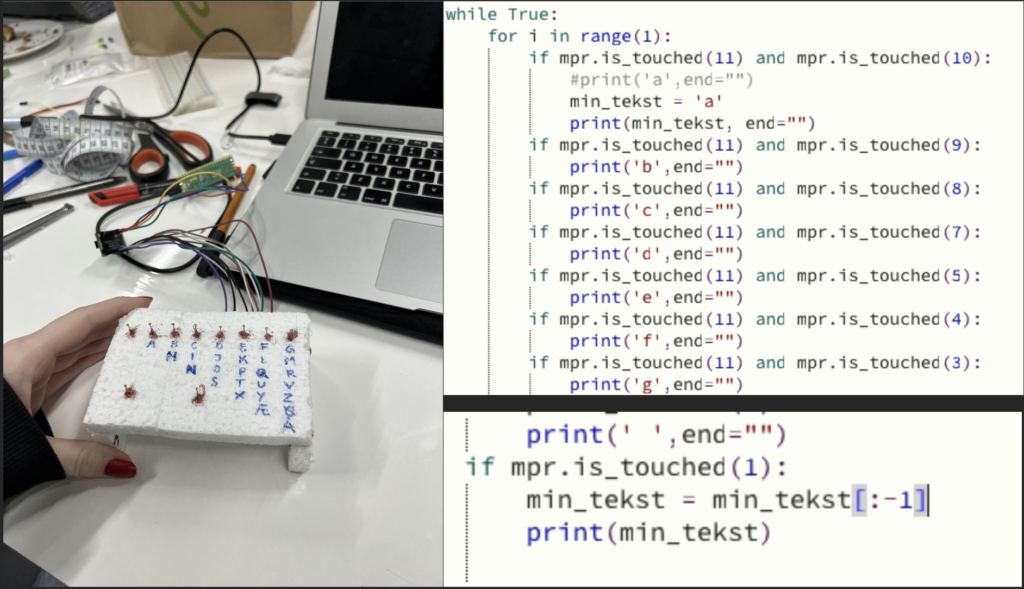
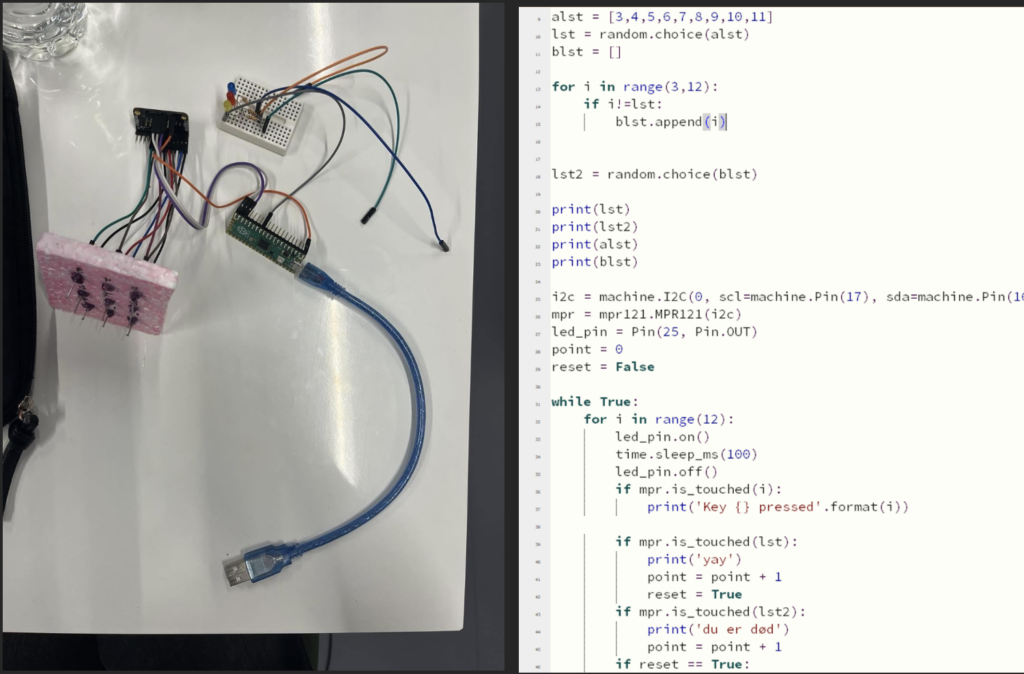
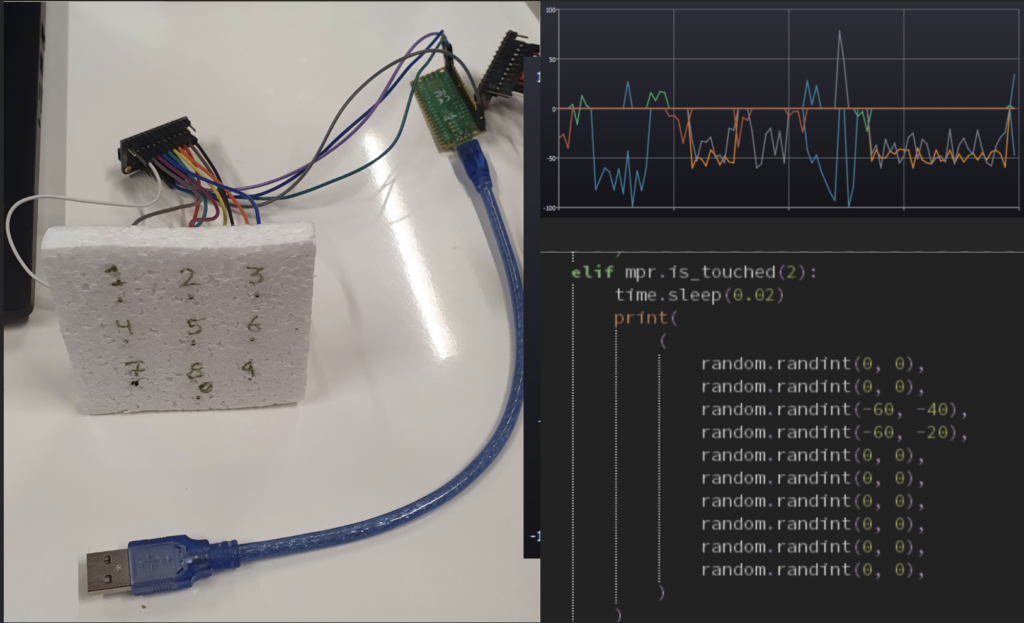


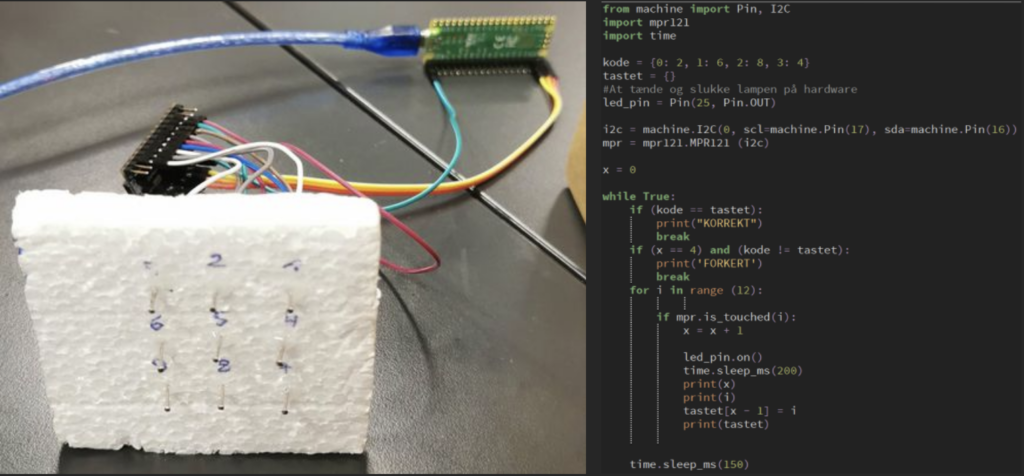
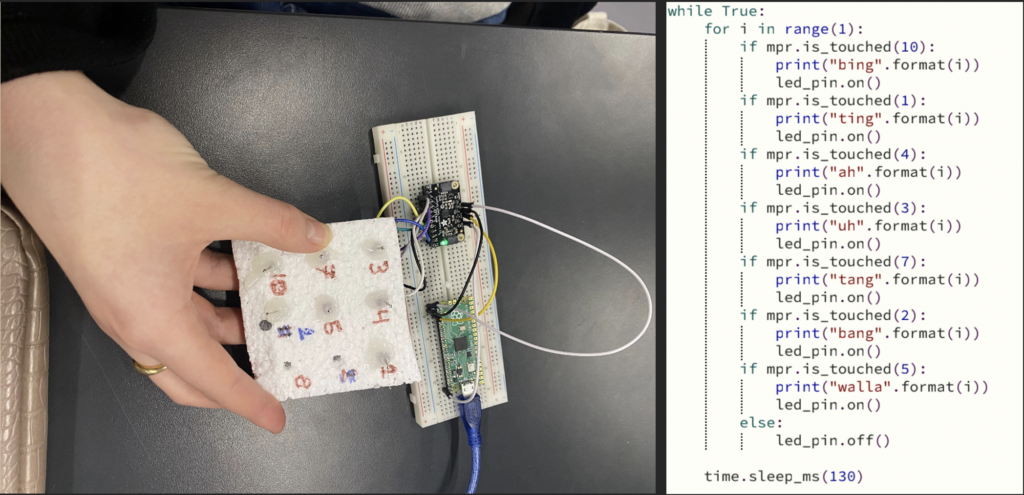
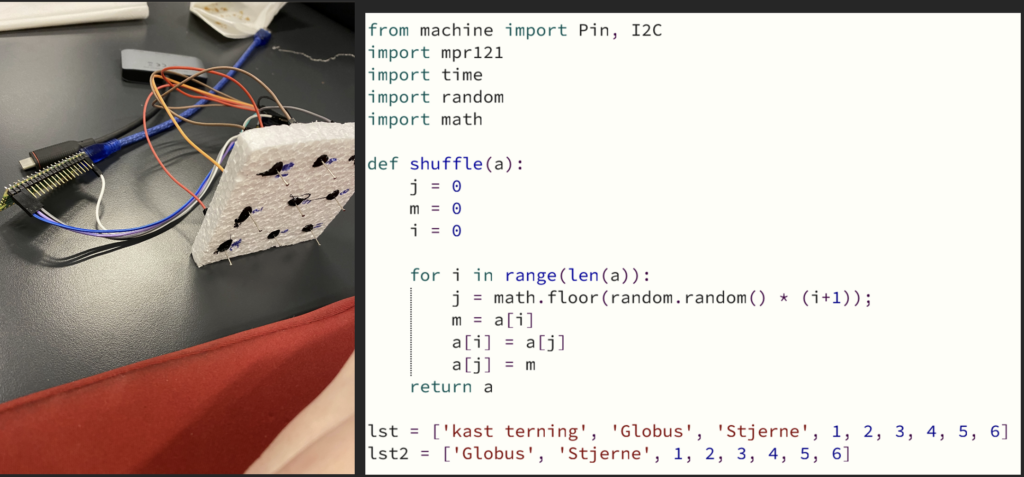
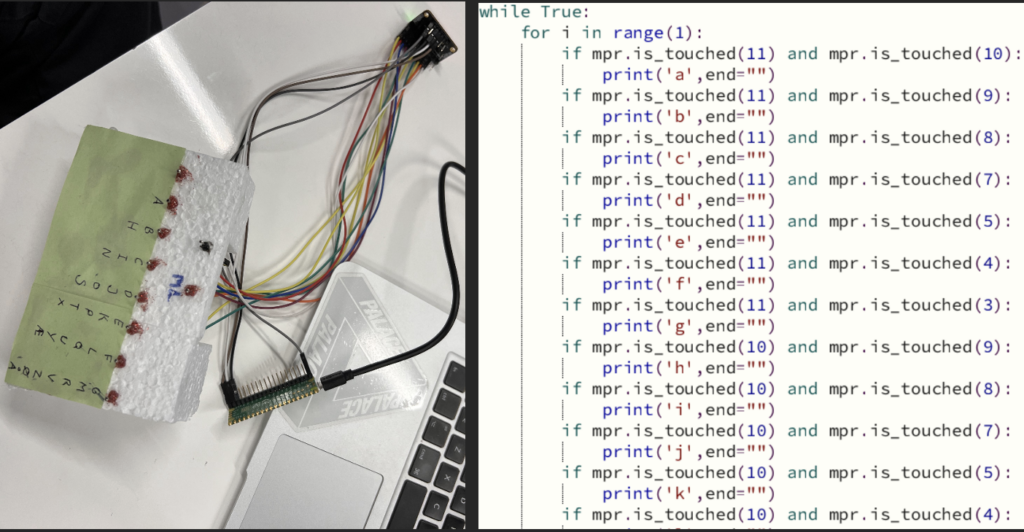
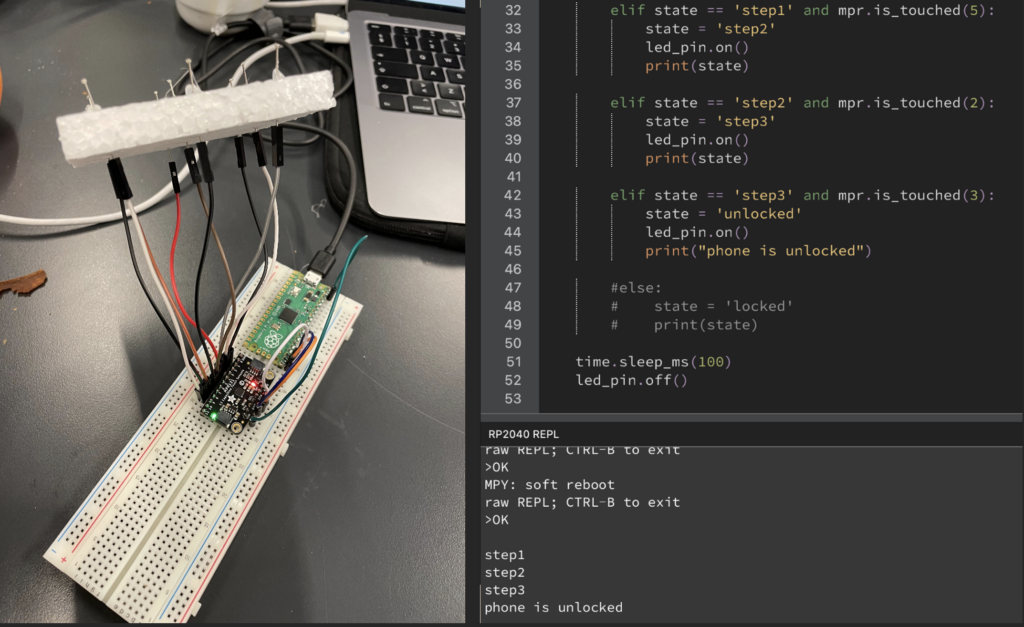
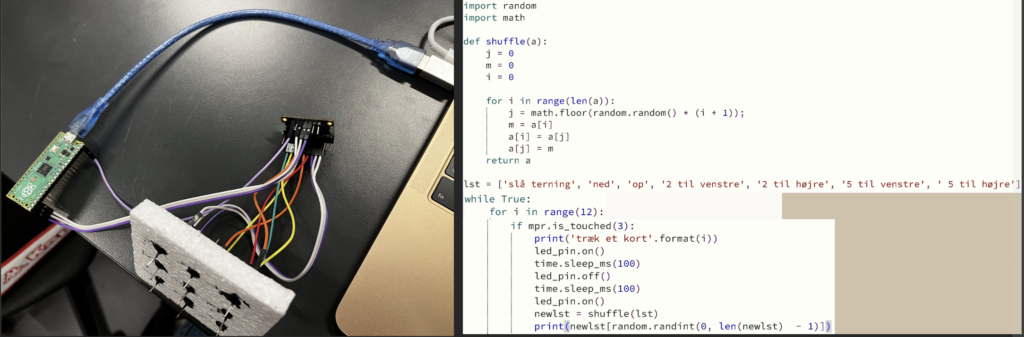
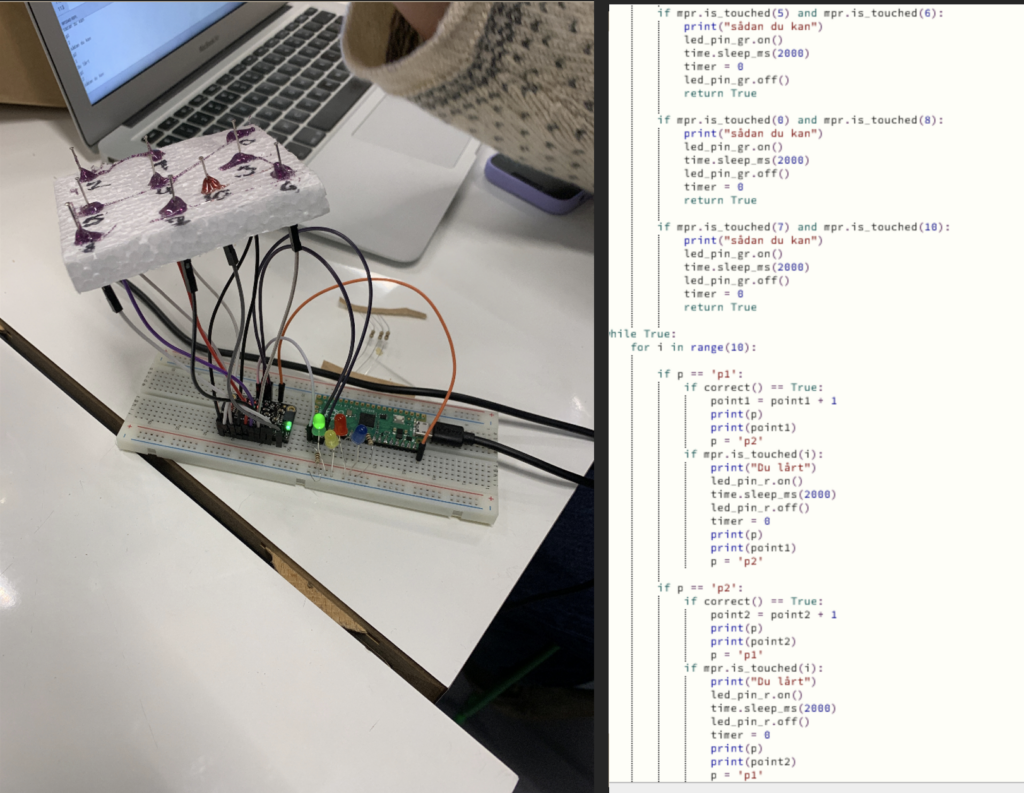
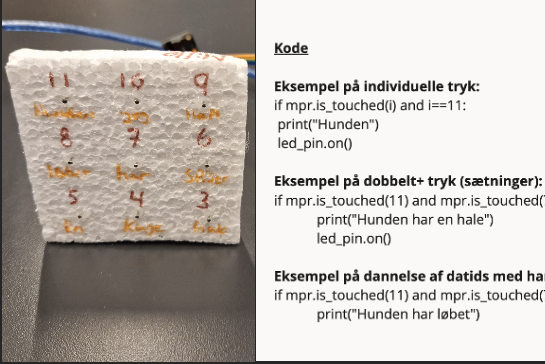
We have gathered all of the student projects in a document with their picture, code and their own description of their artifact. See below.