Next step is that we want to control the Thing using a button, which mean that we want to control when the blinking starts
- Turn off Thing
- Remove USB from laptop
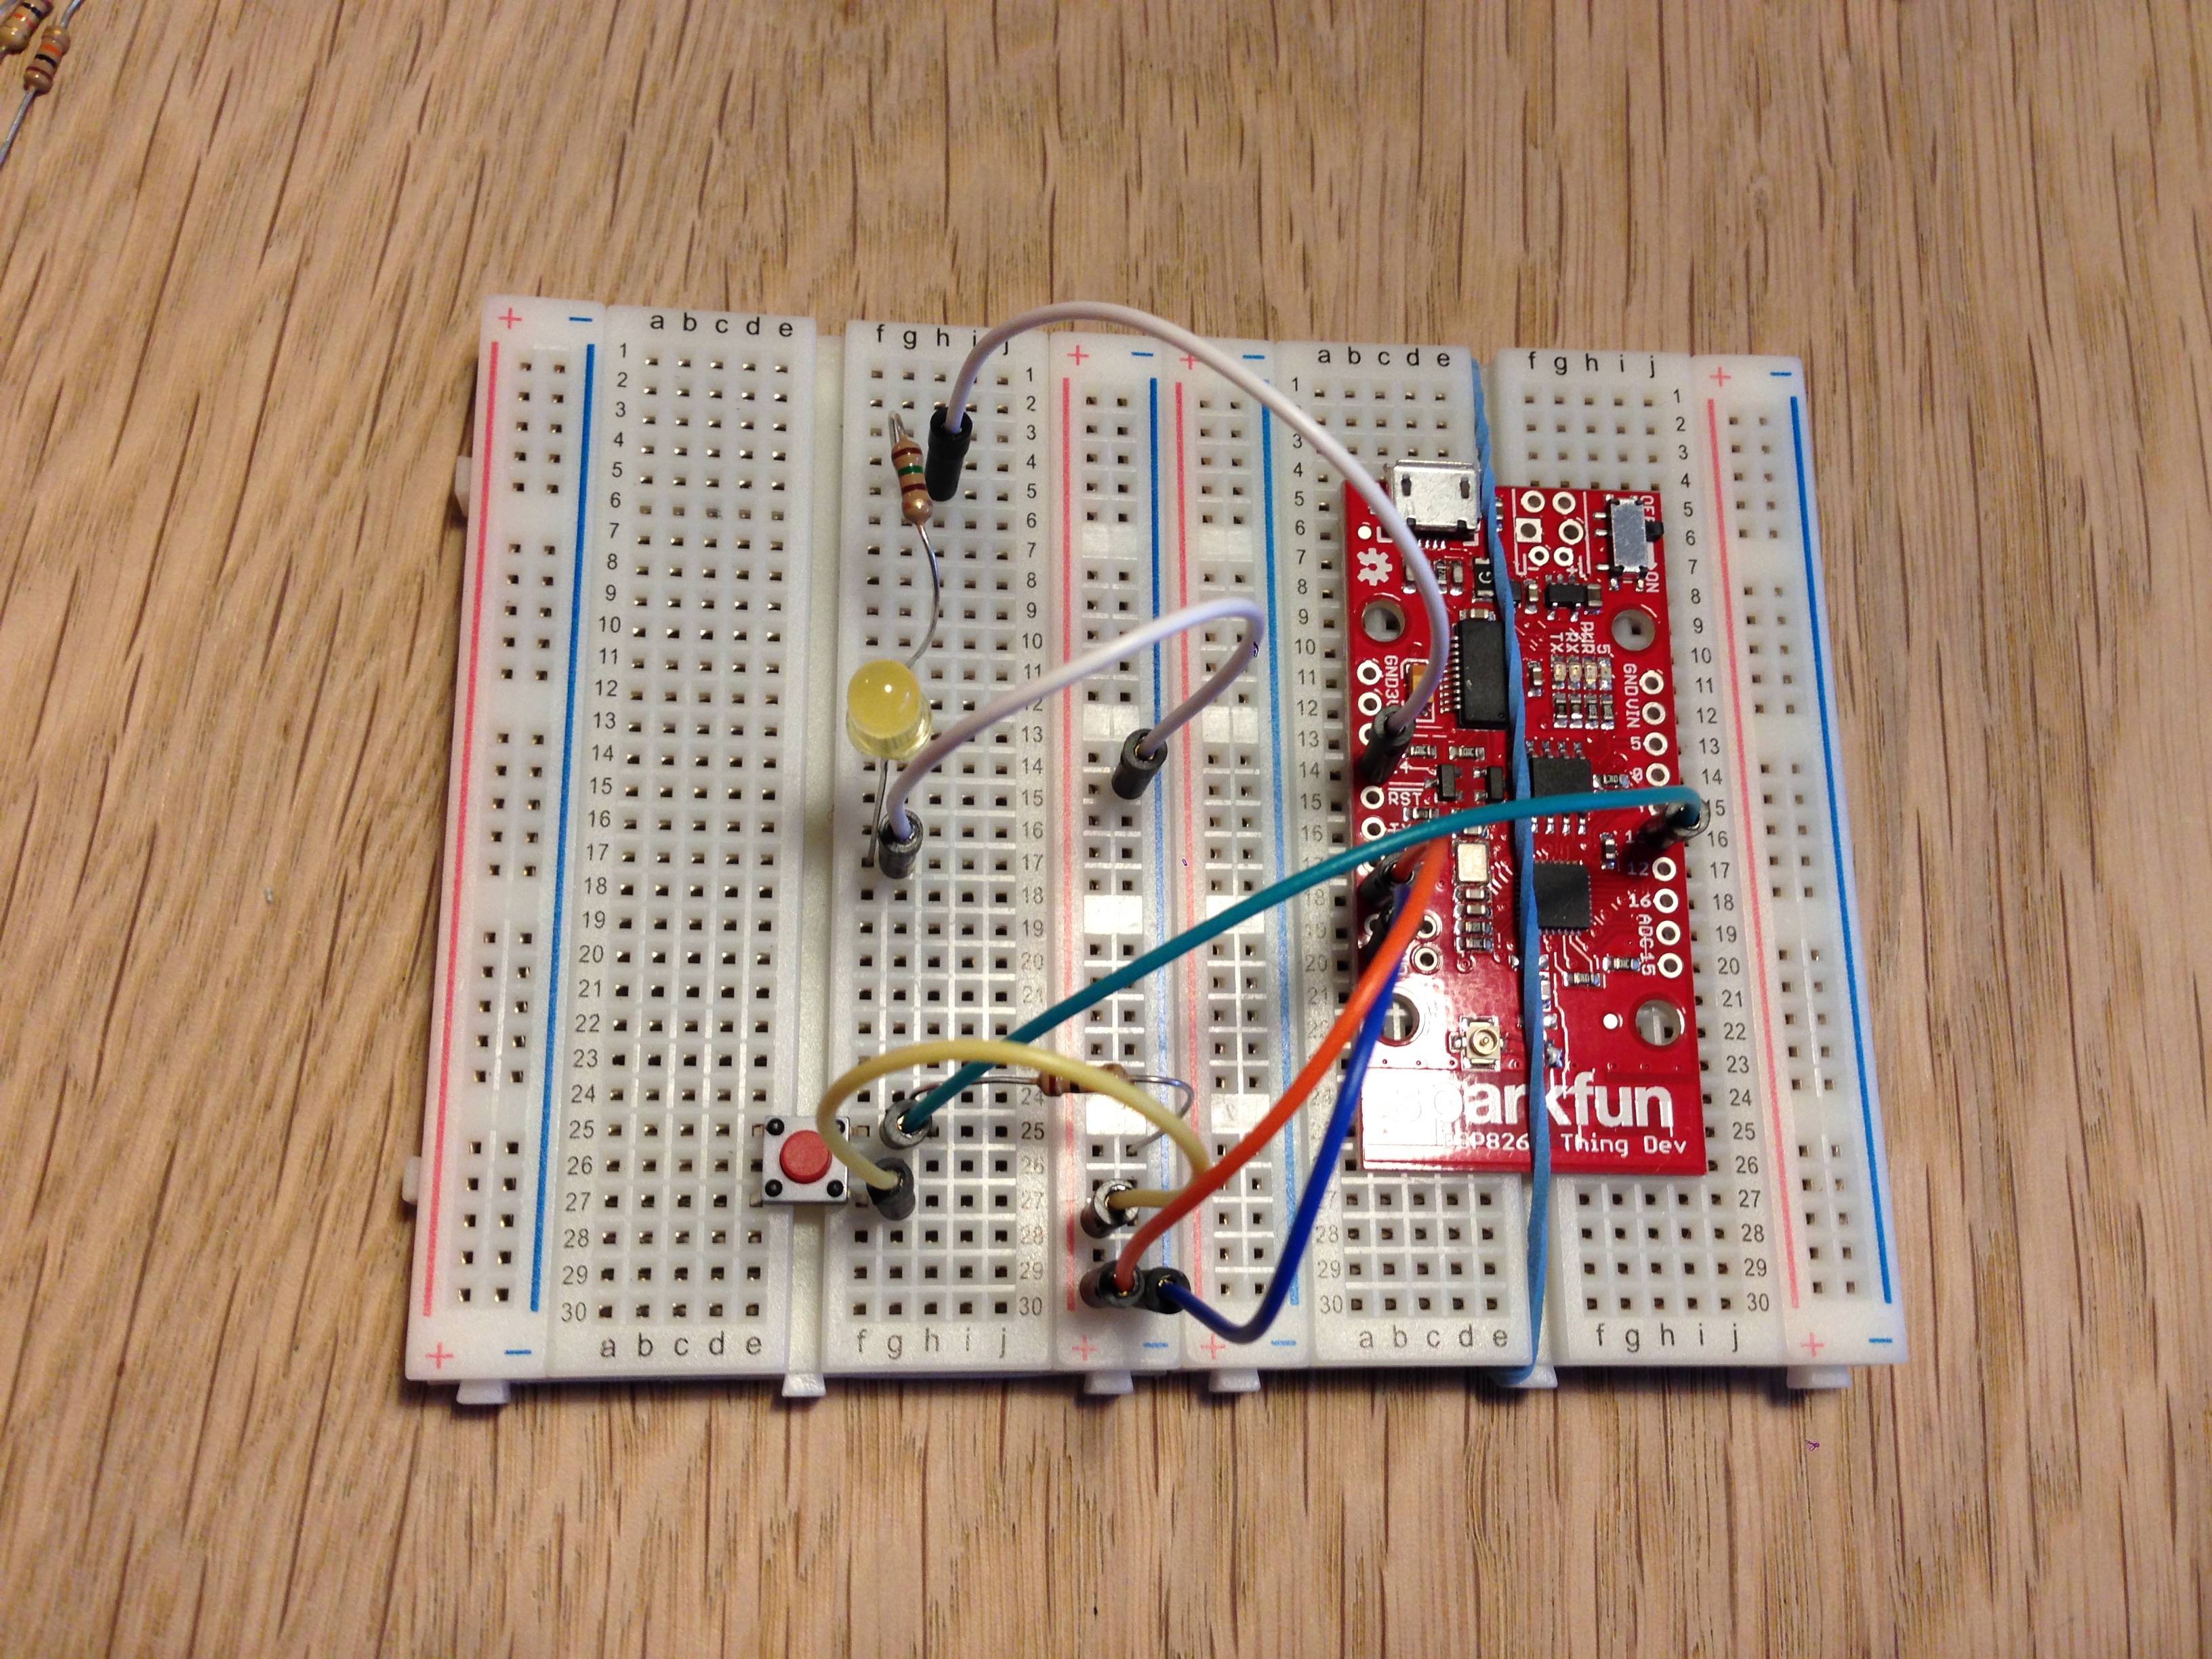
- Wiring up the Thing by adding to the existing setup: you need a Resistor(10k OHM, orange and brown), a button, and three extra wires
- Resistor goes from ‘-’ to ‘h25’ (to the right of the button)
- Button is placed so that it cross the board between ‘f25′-f27’ and ‘e25’-‘e27’
- Signal wire (green) goes from button right to Pin13 in Thing – ‘g25’-pin 13
- Button right leg is connected to ‘+’ (‘g27’-‘+’)
- In Arduino IDE open File>Examples>02.Digital>Button sketch
- Save As … in your Desktop FemTech folder as Button.
- Change “cont int buttonPin = 2;” to “cont int buttonPin = 13;“
- Change “cont int ledPin = 13;” to “cont int ledPin = 14;“
- Reconnect the USB to the computer
- Turn on the Thing
- Try to run the code and see what happens when pushing the button