Before we start, we need to install the different drivers on your computer. Below is a step-by-step instruction for Mac and PC for the installation.
You need to install:
1. Programming environment (we are using the Arduino Integrated Development Environment (IDE), which can be used for microcontroller programming, and this is where we are going to write the code)
1a) Download on this link Arduino IDE 1.8.2 https://www.arduino.cc/en/Main/Software and Install the Arduino IDE 1.8.2 on your computer (choose Mac or Windows Installer) (not the Arduino web editor)
1b) Only Mac – Unzip Arduino file and move to application folder. When you open Arduino it should open a sketch with empty Setup and Loop code.
2. Driver for the hardware (we are using a “Sparkfun Thing Dev Board ESP8266”, so we need to install drivers for the hardware board)
2a) open this link in new browser window: https://learn.sparkfun.com/tutorials/esp8266-thing-development-board-hookup-guide/setting-up-arduino
2b) go down to the heading: Installing the Add-on with the Arduino Board Manager and start here – you end BEFORE BLINK (then return to FemTech website)
- Open Arduino and install addon. Notice on Mac the “Additional Board Manager URLs” are located under Arduino>Preferences (not Files>Preferences) – but on PC it is Files>Preferences
- Install board manager, it should be in the bottom of Tools > Boards > Boards Manager. It’s named esp8266 – click install.
- Connect Sparkfun Thing Dev Board ESP8266 to Laptop via USB cable.
- Select “SparkFun ESP8266Thing Dev” board (NOTICE there are TWO ESP8266, you need the DEV one) in Tools>Boards
- Select usbserial port under Tools>Port
- Select Tools>Upload Speed>921600
If it does not work – and you are on Mac you need to update FTDI drivers: http://www.ftdichip.com/Drivers/VCP.htm. You need to update the driver with the Thing connected and in the ON power position. (The FTDI is a little chip on the Thing that converts between USB and Serial communication.
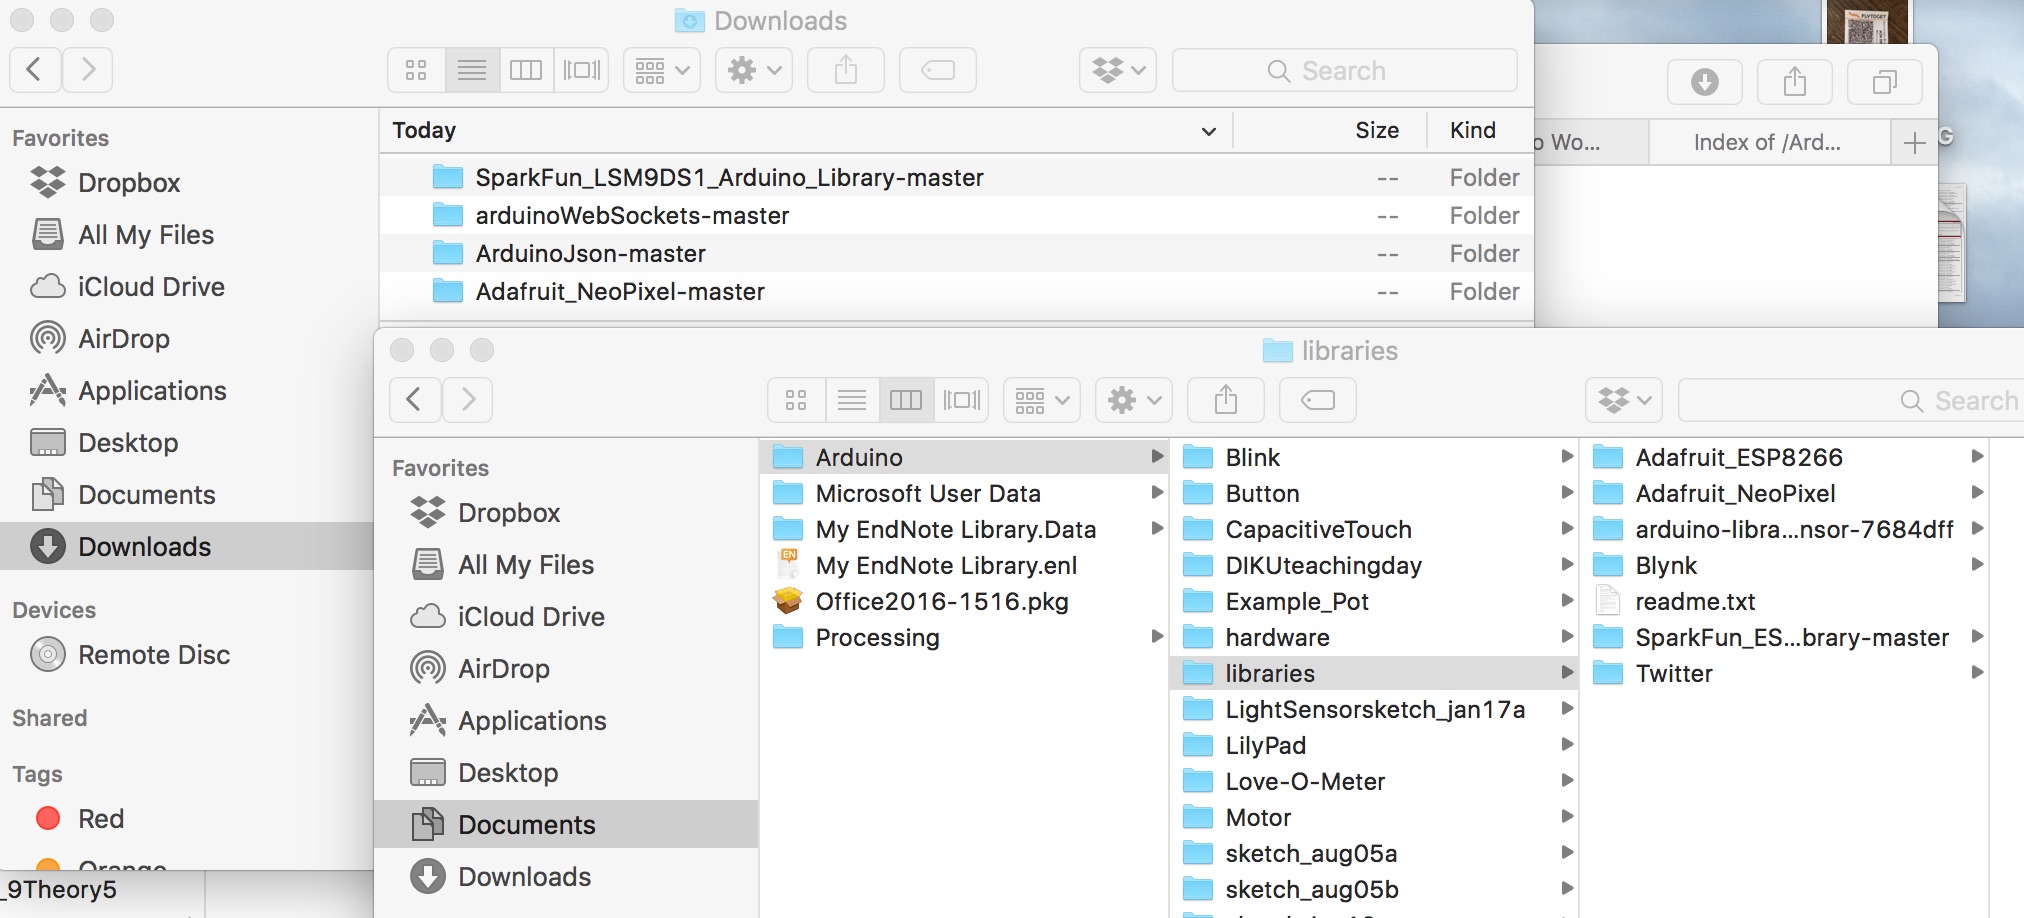
3. Install the LED strip and motion sensor libraries ()
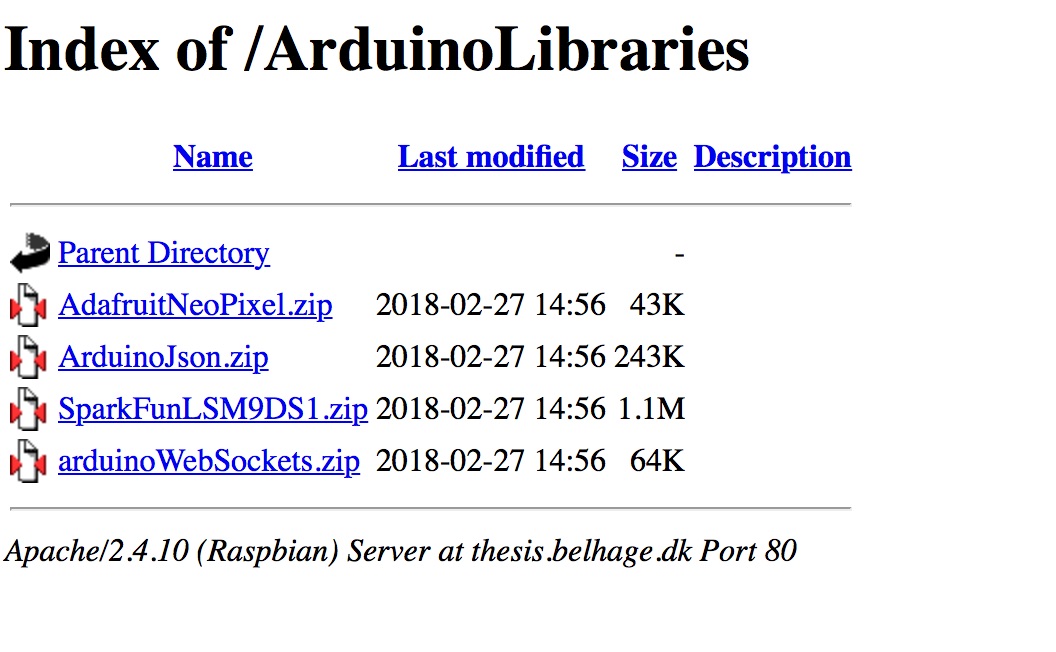
3a) Download the four library folders http://thesis.belhage.dk/ArduinoLibraries/
3b) Move the four folders from the download folder to Documents/Arduino/libraries