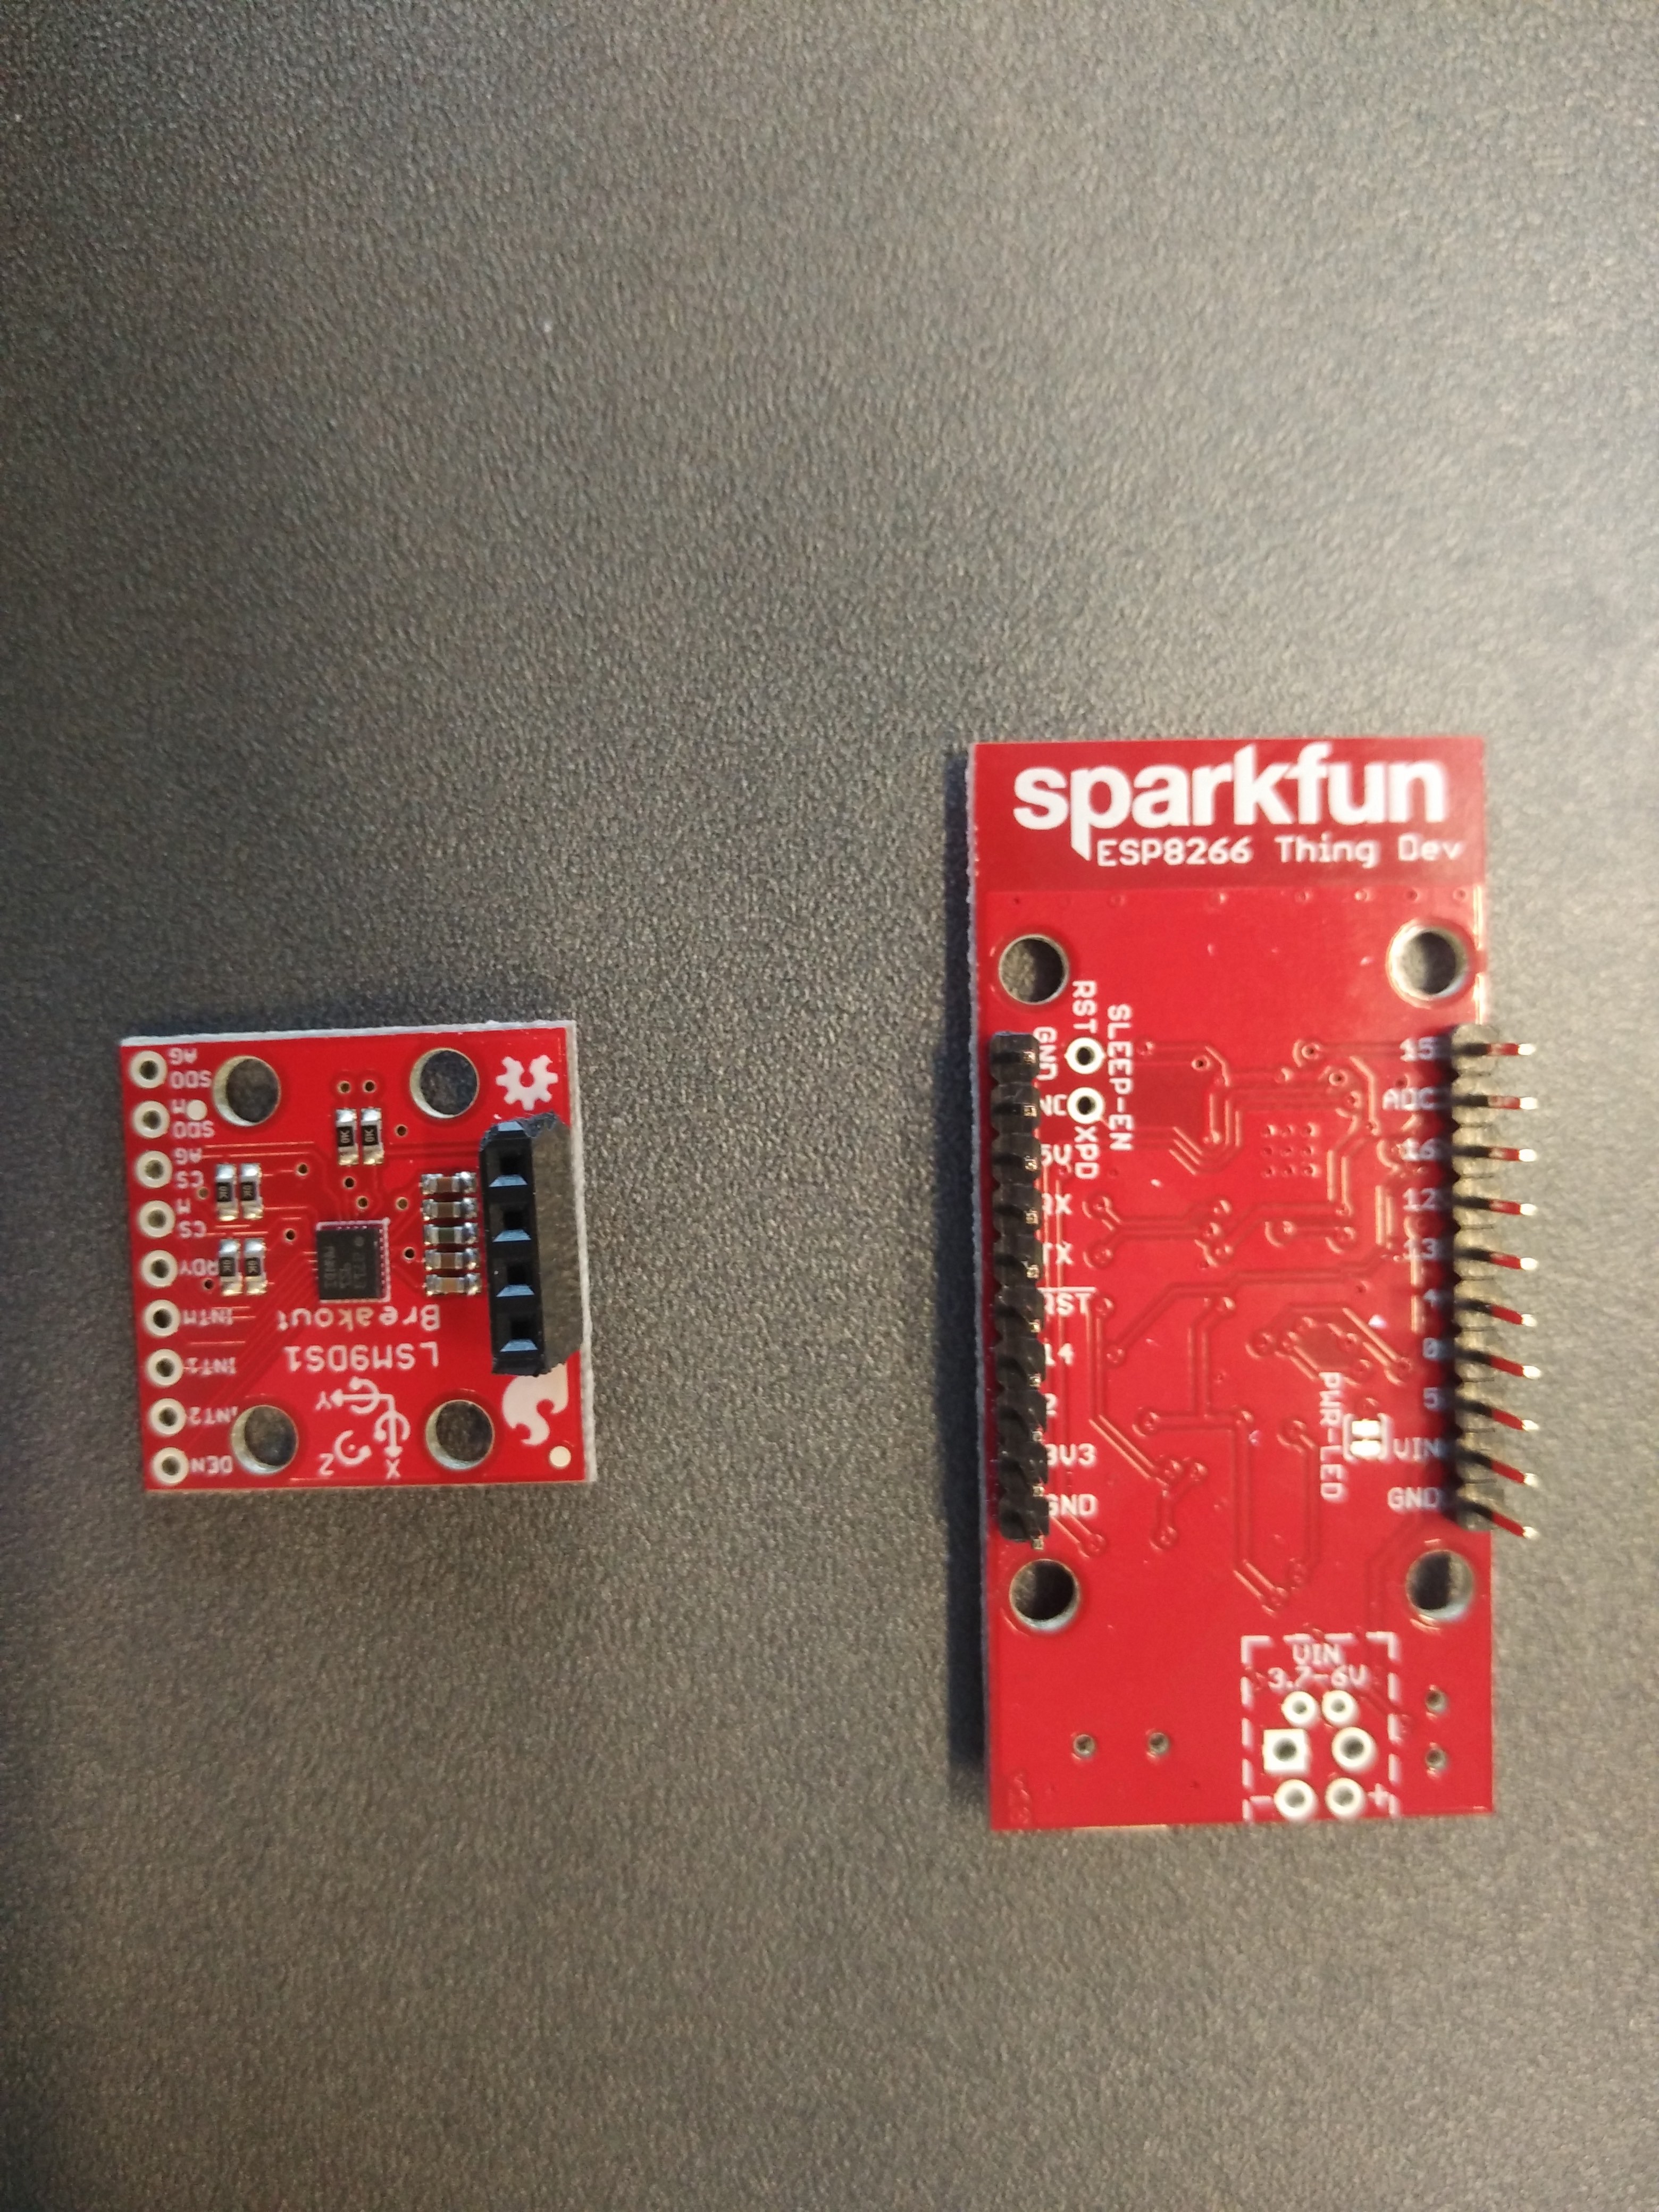
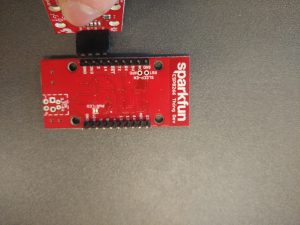
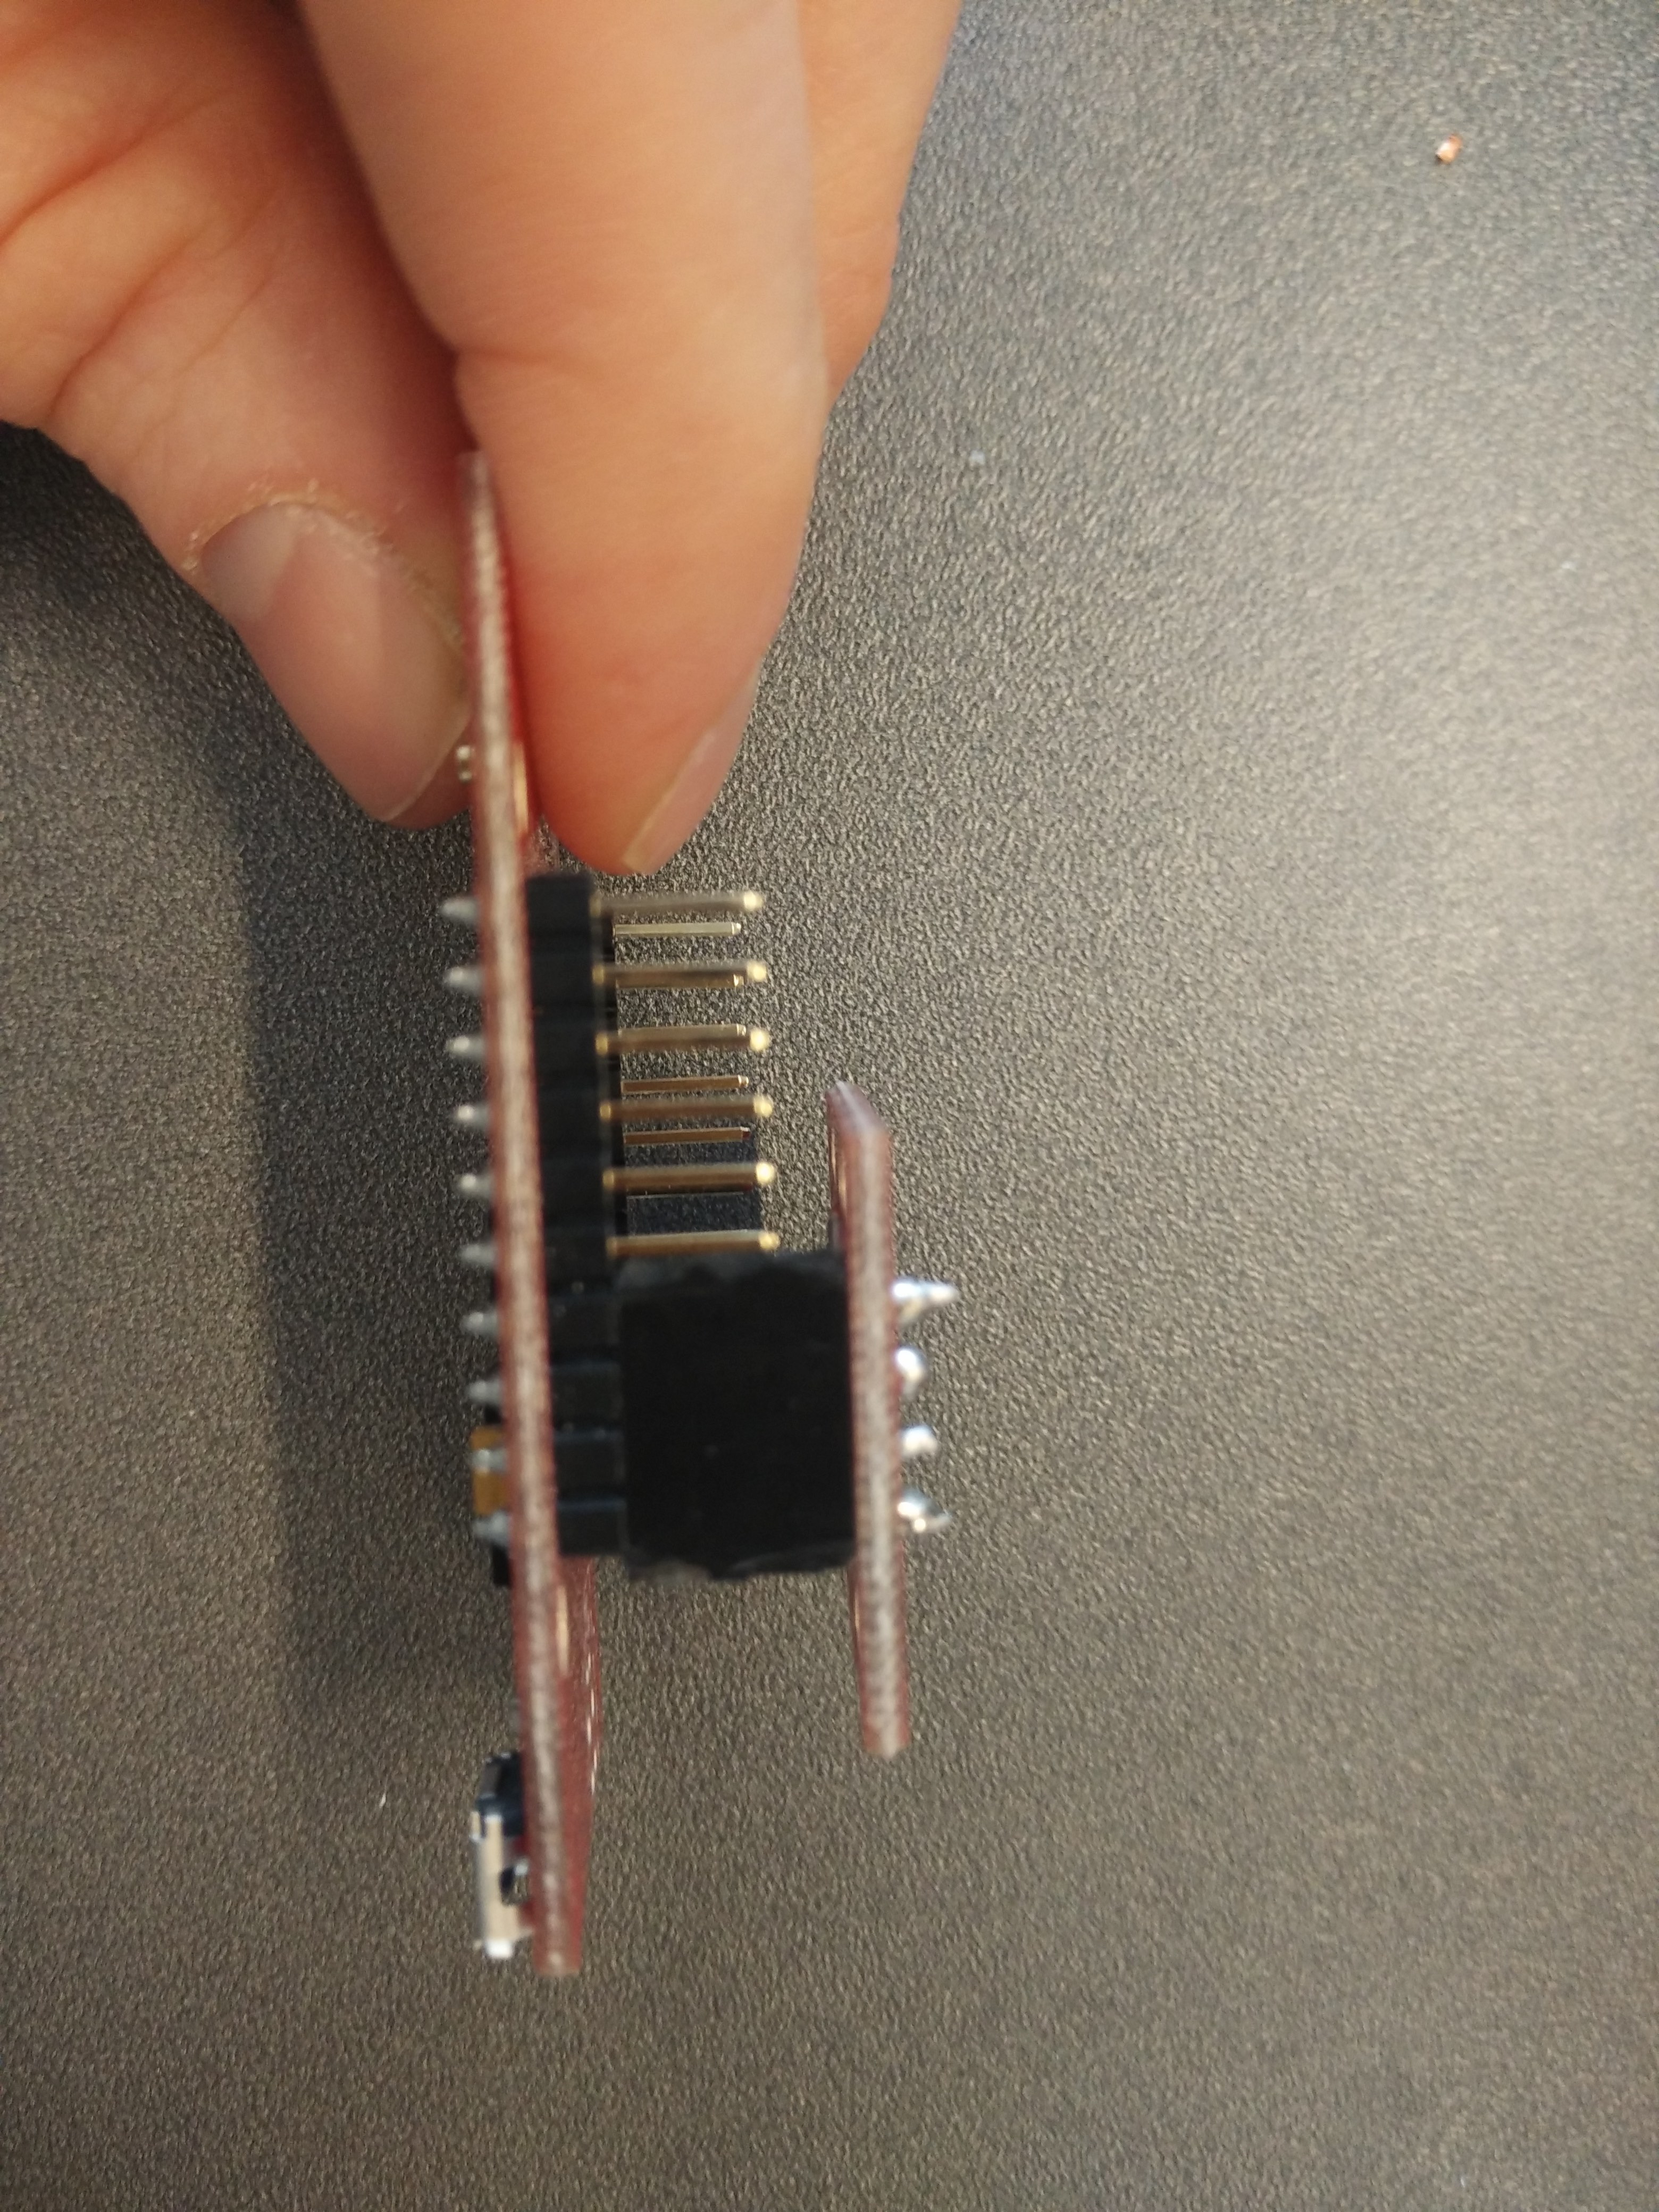
First, add the motion sensor to the Thing:
To add the motion sensor to the Thing – you need to make sure that the sensor is attached to the right pins:
Thing: GND=Sensor: GND
Thing: 3V3=Sensor: 1.9-3.6V
Thing: Pin 2=Sensor: SOA
Thing: Pin 14=Sensor: SCL
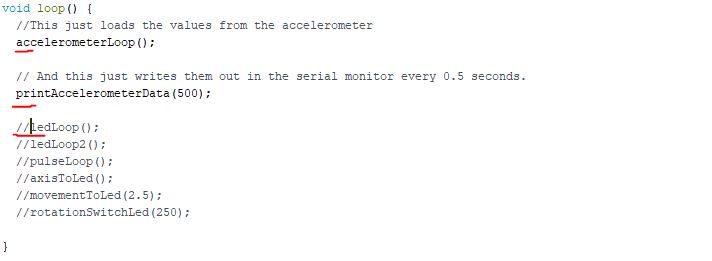
Then, experiment with the accelerometer and gyroscope using the code. For doing that, using the same example code as with the LED strip, you should uncomment some and uncomment other parts of the main “loop()” function; Like so:
Before:
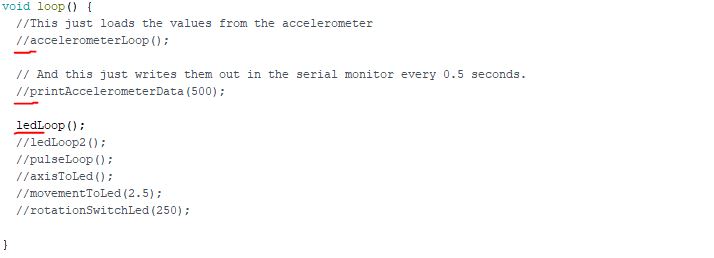
After:
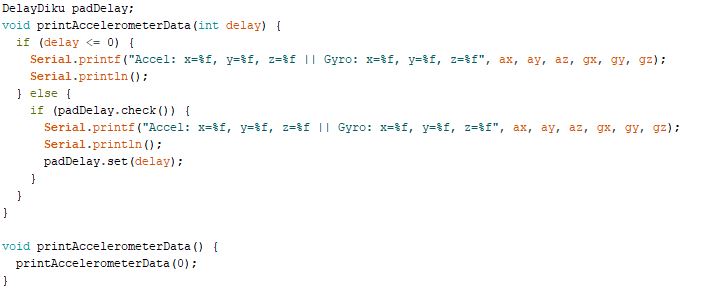
These two functions are fairly straightforward in their purpose; “accelerometerLoop” fetches the measurements from the accelerometer, and stores them in six variables: “ax”, “ay”, “az”, “gx”, “gy” or “gz”, which is the acceleration in the three dimensions and the rotation in the three dimensions respectively.
“printAccelerometerData()” writes out the data in the serial monitor so you can read it.
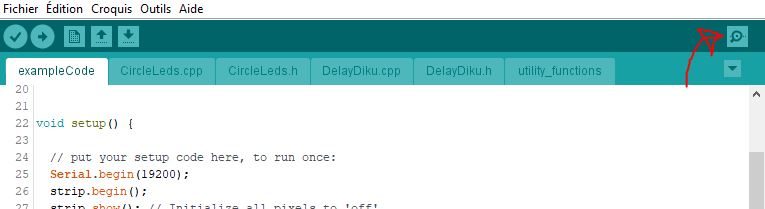
So, before compiling and uploading it to your device, open the serial monitor. The serial monitor is a window with all the text that your program “prints”. E.g. the code Serial.println(“Hello, World!”) would write a line with the text “Hello, World!” to the serial monitor.
You can open the serial monitor by clicking on the spyglass-button (top right).
Now you are ready to compile and upload!
Upon running the code, you should see some text appearing on the serial monitor. This is the data we get from the accelerometer. Specifically, the numbers written corresponds to the amount of movement (Acceleration in m/s^2) and rotational force (degrees per second) in each of the three dimensions.
Try picking up the device and see what happens to the numbers! It may be difficult at first, but try getting an intuitive understanding of why the numbers change. Use the drawing on the axes on the back of the accelerometer for reference.
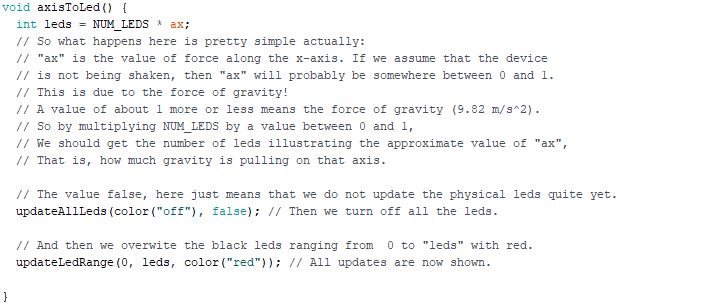
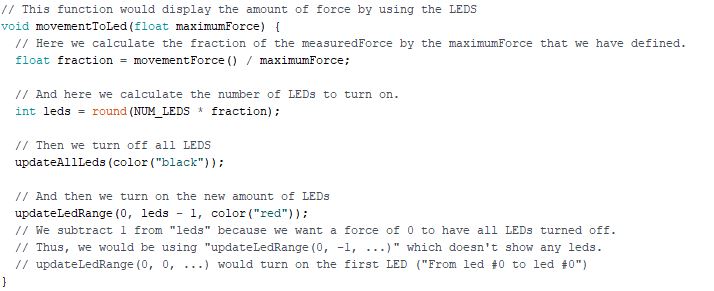
When you believe that you are ready to proceed, see what happens when you uncomment any of the functions “axisToLed”, “movementToLed”, or “rotationSwitchLed” (only one at a time – as demonstrated below).
![]()
![]()
![]()
![]()

The next step is to build the Cryptosphere: