After installing the drivers, let’s see if we are able to do the standard ‘ Hello world’, which in the world of the Thing means: let’s get the Thing to Blink
- Plug and connect the Thing with the USB cable to your computer.
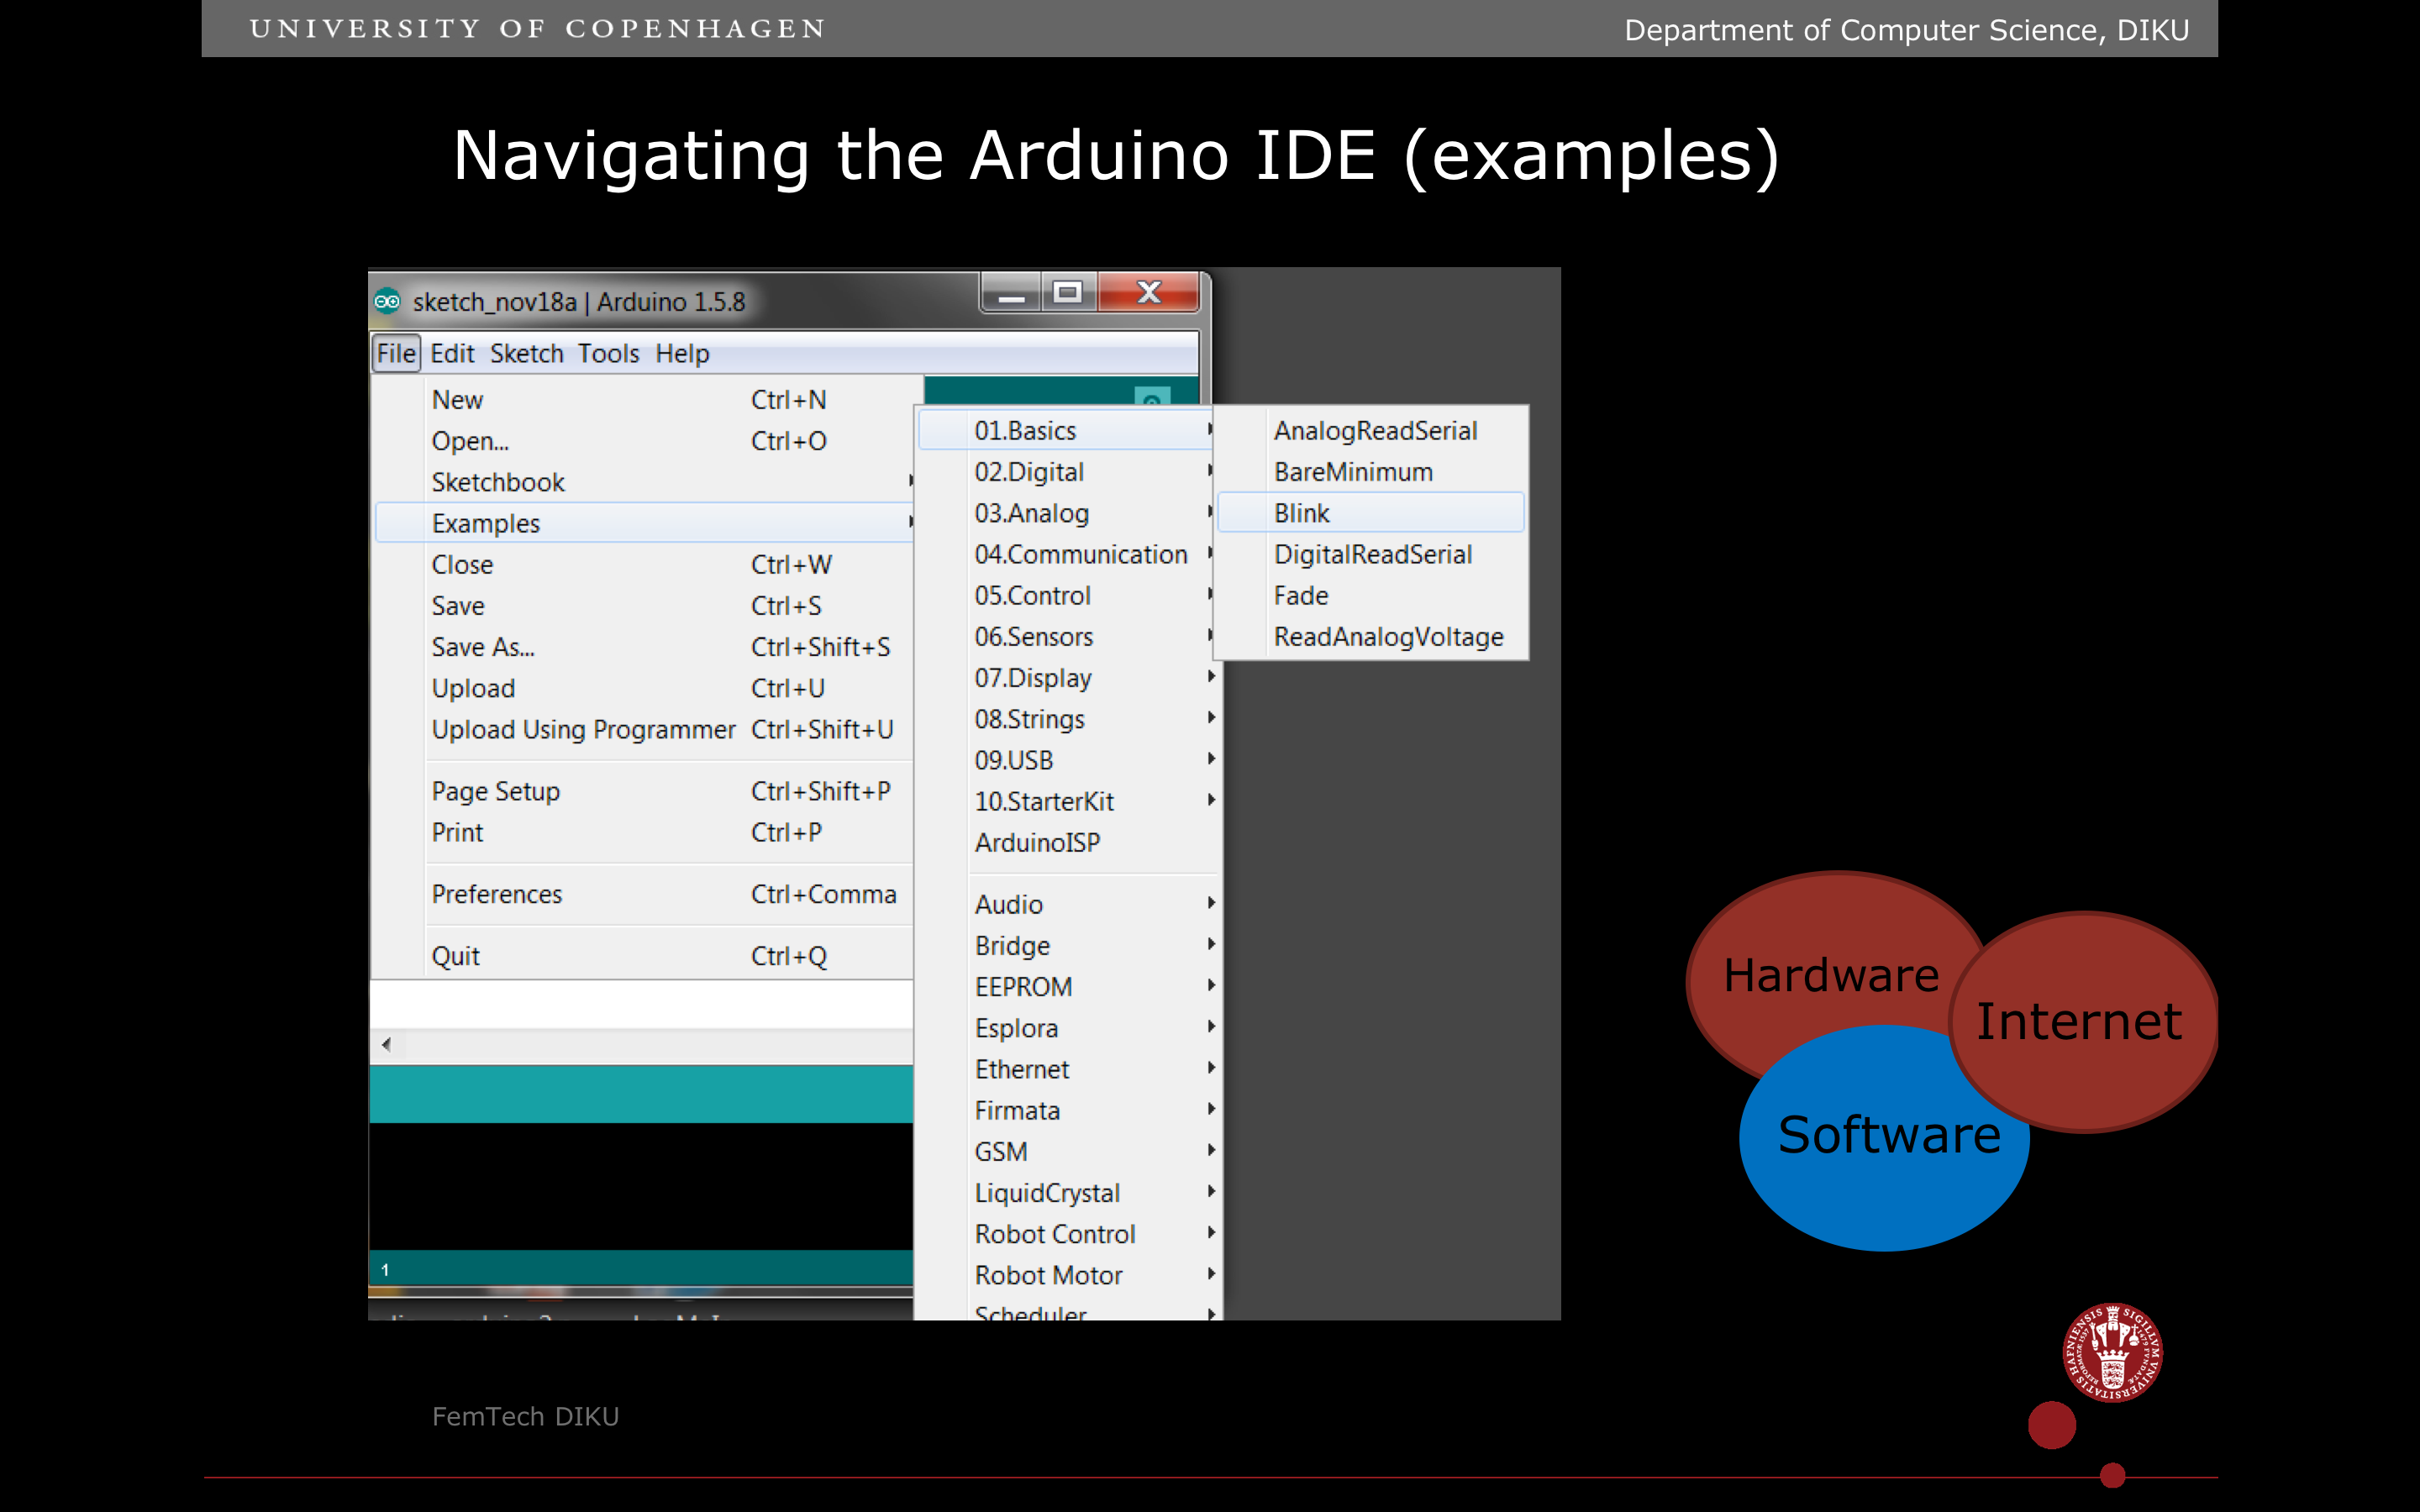
- In Arduino IDE choose File>Examples>01.Basics>Blink. This should open a sketch with code.

3. Save the sketch in a folder on your Desktop, name the folder “FemTech.dk” and the file Blink. On Mac to open up folder selection and creation in Finder, click the little downwards pointing arrow next to the name of the file.
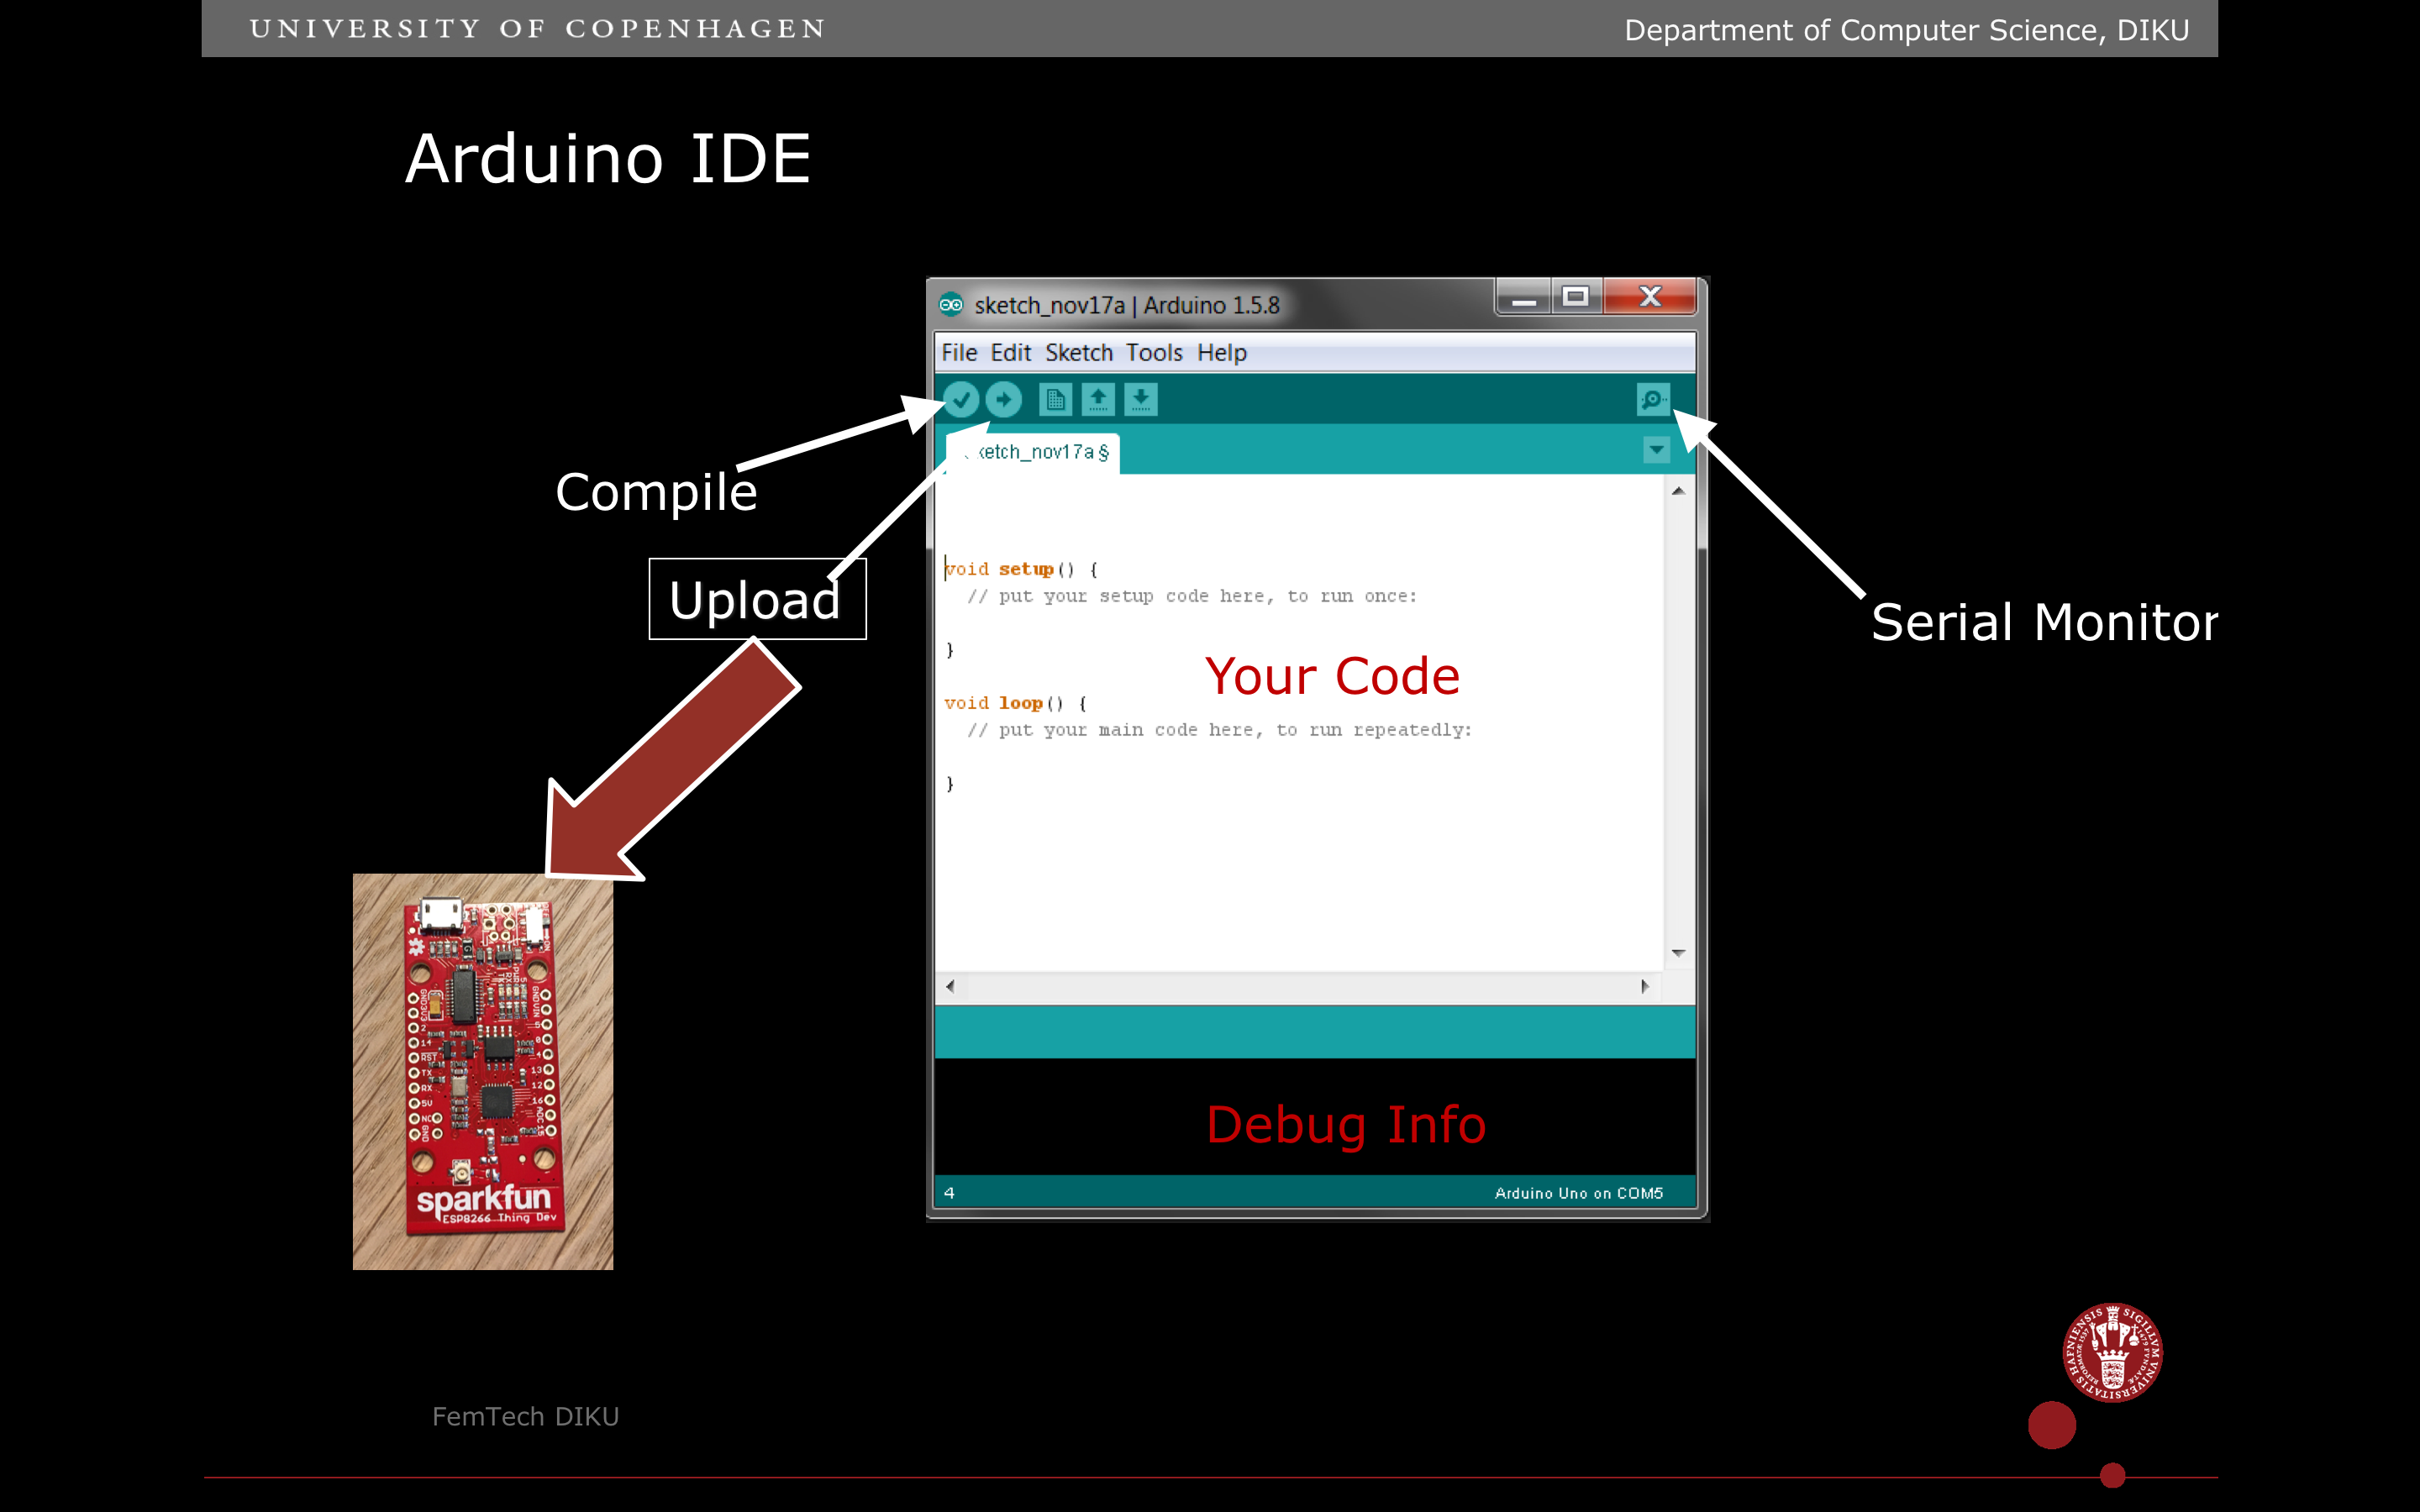
4. You navigate the Arduino user-interface – you need to know the below main part – Compile (translating the code into), Upload (uploading the code to the Thing), and then the Serial Monitor, where you can see text on the screen (useful for debugging).
5. Make sure power switch is in ON position on the Thing and the USB is connected.
6. Verify and Upload Blink to the Thing. Verify is the little ‘check mark’ icon and upload is the icon with an arrow pointing to the right.
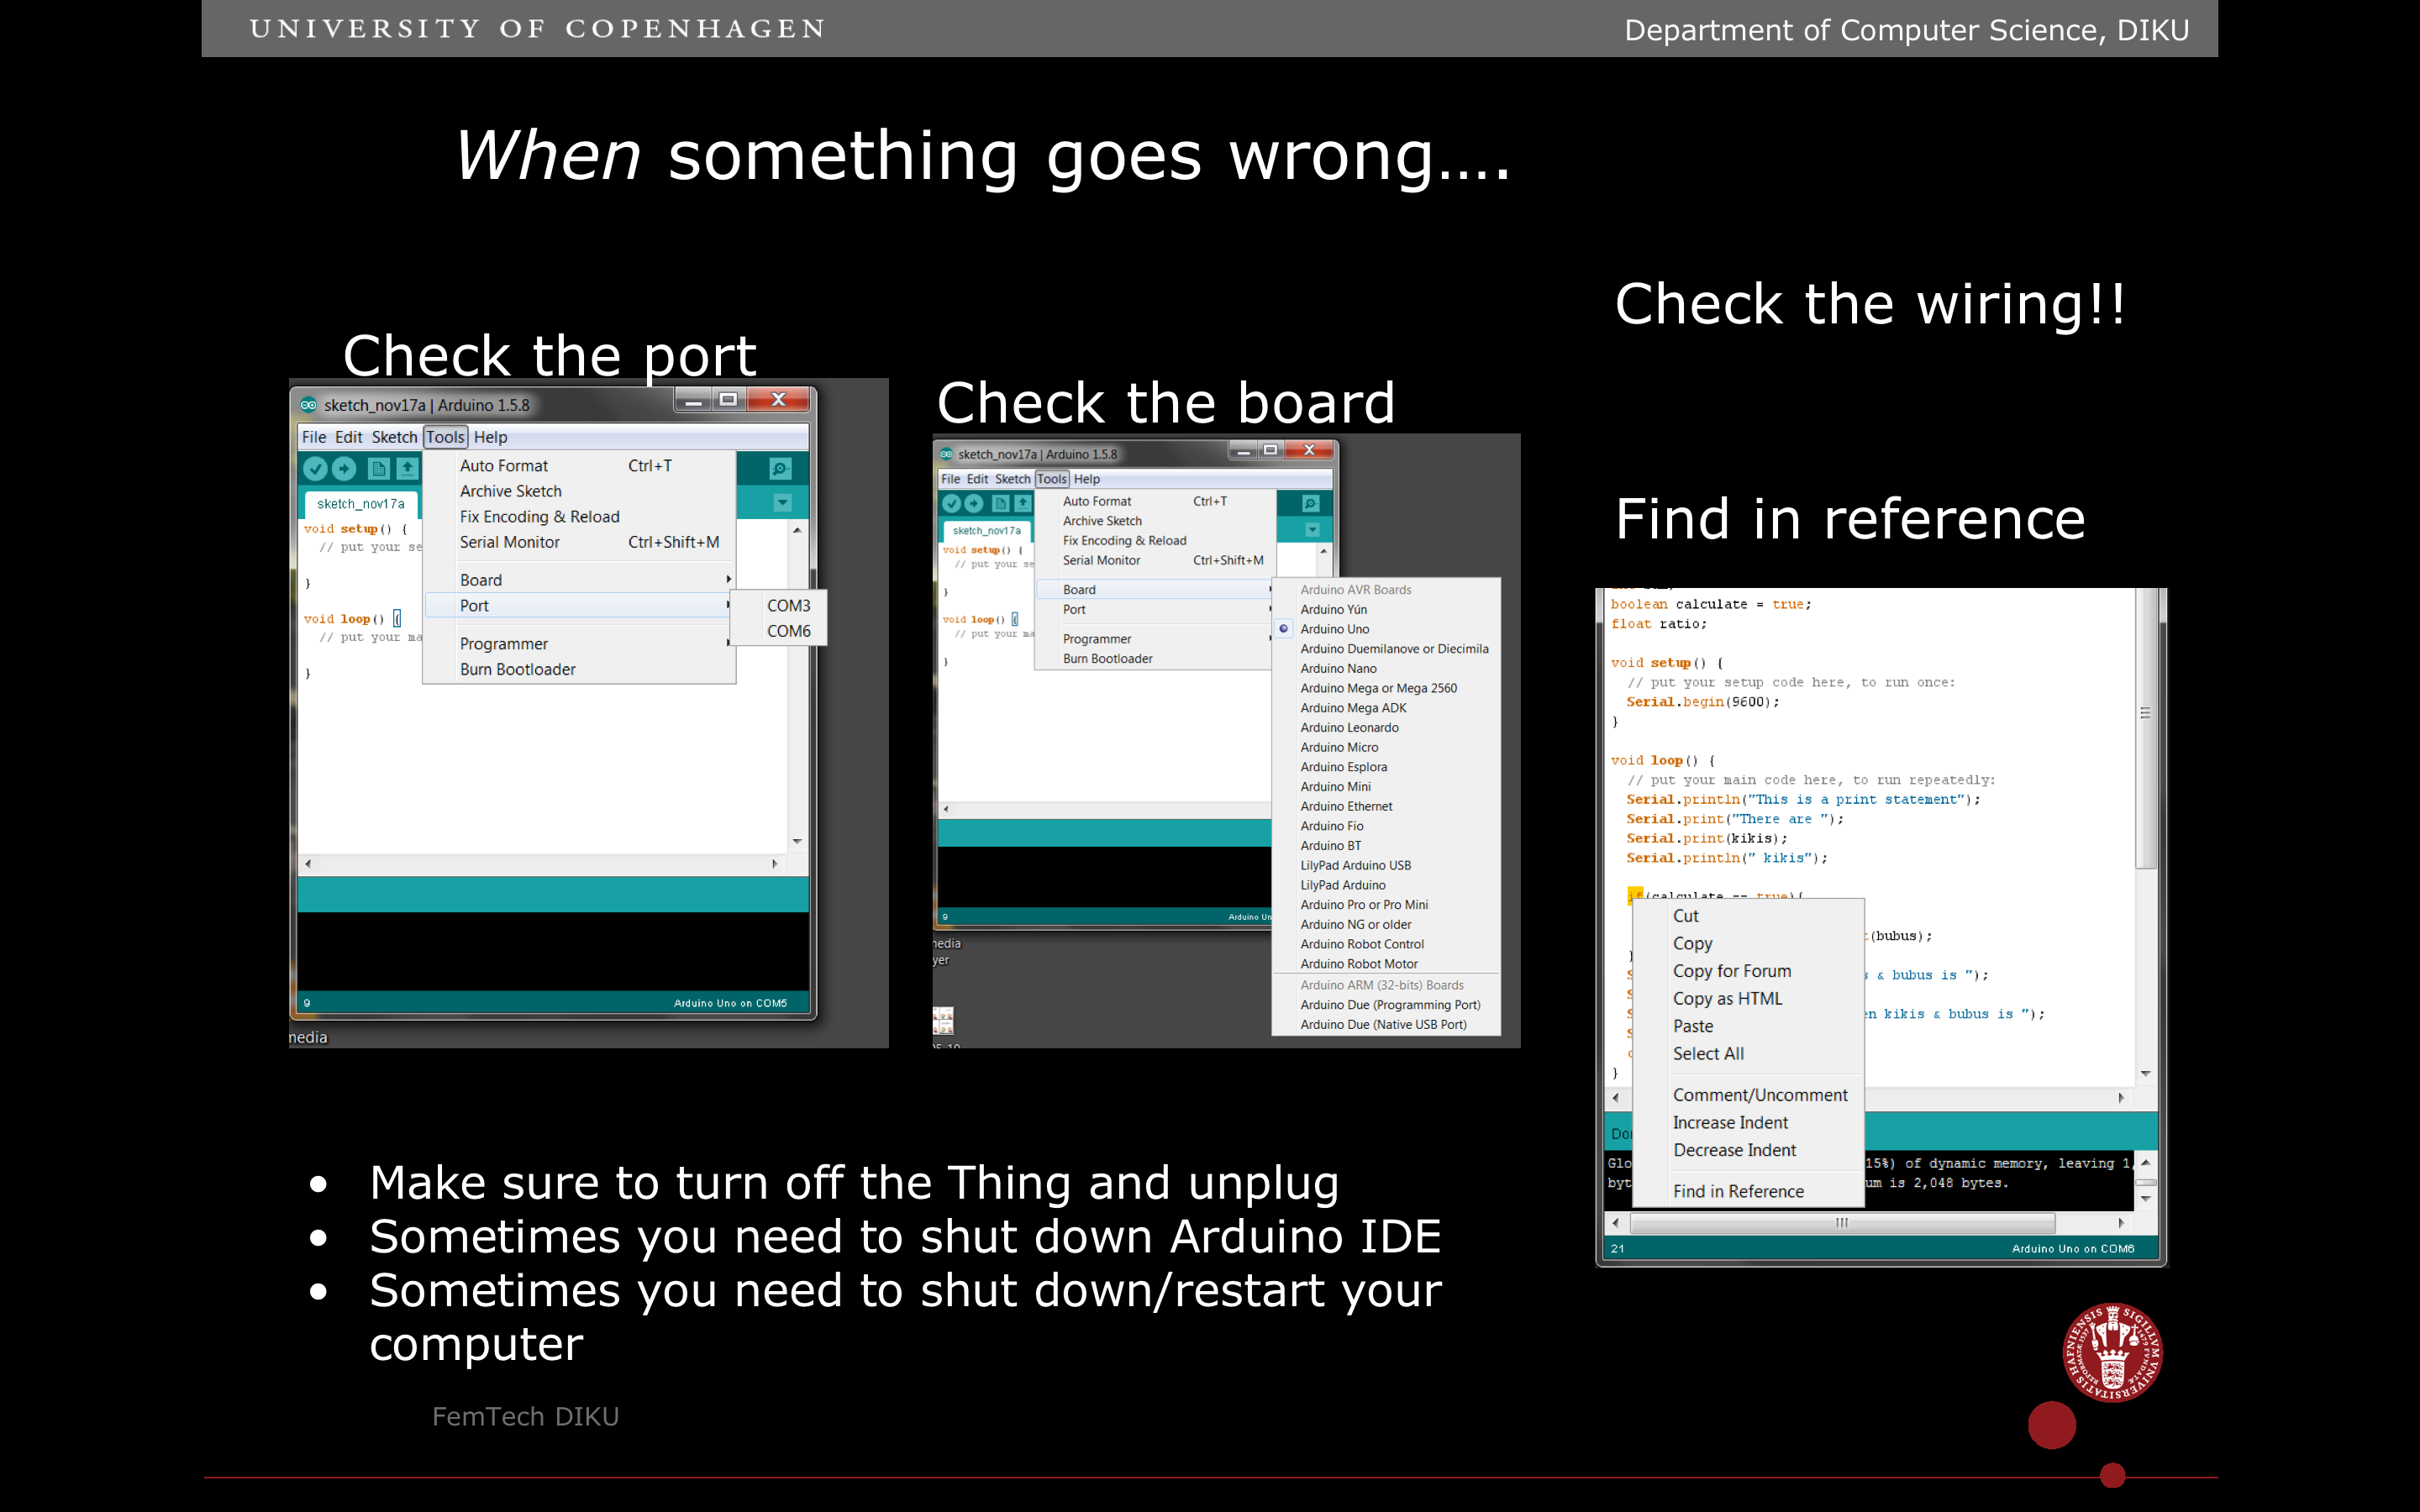
6a) PLEASE notice that you need to set the port right to make it work. To set the port: Choose Tools in the menu bar, Choose port in the dropdown menu, and then choose the Port, which starts with something like: “/dev/cu.usbserial” followed by capital letters and numbers – something like: “DN031D21”
7. See your Thing blink blue!
Now that we know how to make the internal LED work, the next step is to make the LED strip light: